Photoshop�ϳɱ�����Ч�Ľ��~������Ӣ��(6)
����Դ�� Tutsplus.com�����x���� Jenny Le �o�҂����������ʵ����£�Step 8
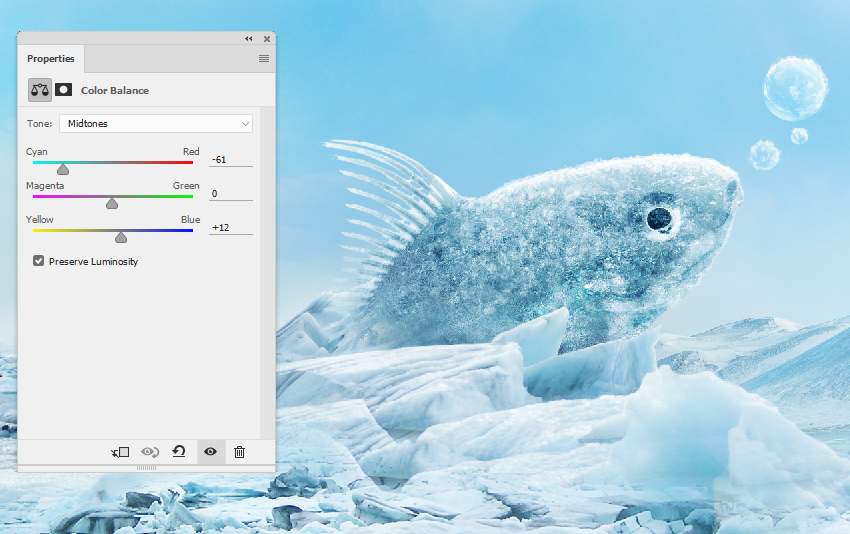
Select all ice layers and hit Control-G to make a group for them. Change the group's mode to Normal 100%and use a Color Balance adjustment layer within the group to change the ice's color.
Step 9
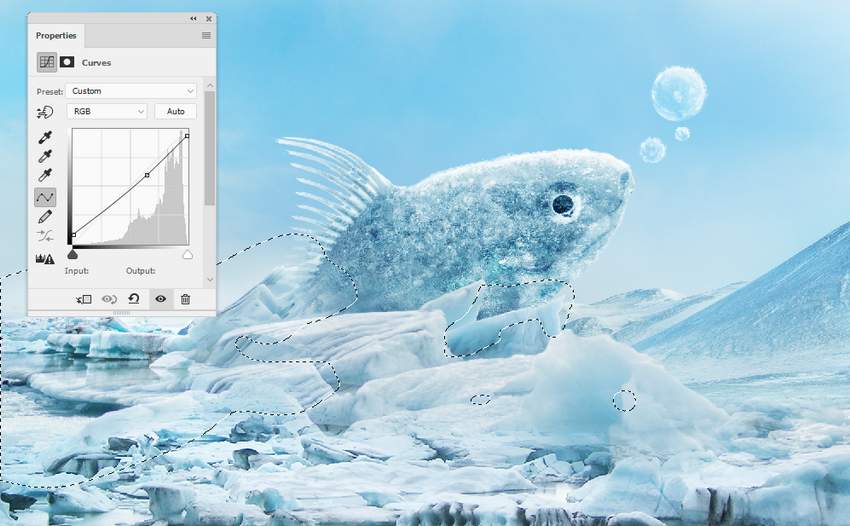
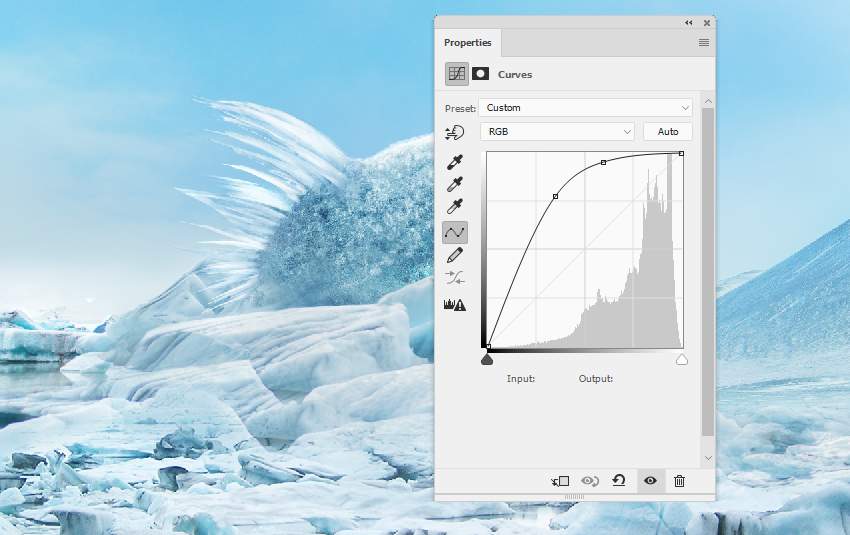
Create a Curves adjustment layer to reduce the highlights on the ice a little. Paint on the shadow areas or back details so they won't be affected or will be less affected by this adjustment layer. Lower the brush's opacity if needed on the areas which are bright enough.
6. How to Create the Icy Fins
Step 1
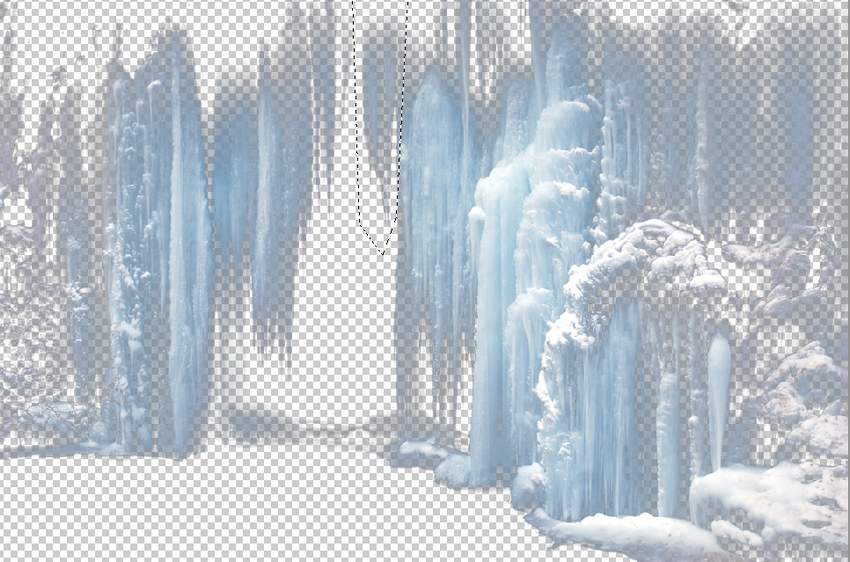
Open the icicles image. Isolate the icicles from the dark background. Select a part using the Polygonal Lasso Tool and add it to the fish's fins. Tweak this part using Control-T with the Warp mode, following the form of the original fins.

Step 2
Take other parts from the original image to cover the fins' area. Use a layer mask if needed to blend the icicles better with the fish's body.
Step 3
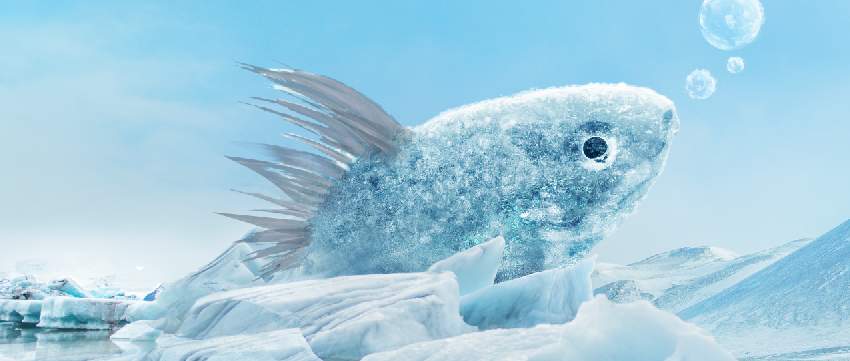
Create a group for the icicles layers and use a Color Balance adjustment layer to change their color.

Step 4
Make a Curves adjustment layer to brighten the icicles. Use a layer mask to reveal some shadows of the icicles to avoid a flat look.

 ��ǵ���
-
 Photoshop�������L�������ƬЧ����Ӣ��2018-04-23
-
 Photoshop�ϳ��L����������L�i¹��Ӣ��2018-04-23
-
 Photoshop�ϳɱ�����Ч�Ľ��~������Ӣ��2018-02-10
-
 Photoshop�ϳɉ����L���ɭ�ֈ�����Ӣ��2018-02-10
-
 Photoshop�ϳ�����ʩ��������Ӣ��2018-02-10
-
 Photoshop���������|�е�3D���w�֡�Ӣ��2018-01-09
-
 Photoshop�OӋ����ȼ��ˇ�g�ֽ̡̳�Ӣ��2018-01-09
-
Photoshop�ϳ��L����������L�i¹��Ӣ��
���P����13832018-04-23
-
Photoshop�ϳɉ����L���ɭ�ֈ�����Ӣ��
���P����24492018-02-10
-
Photoshop�ϳ�����ʩ��������Ӣ��
���P����8372018-02-10
-
 Photoshop�ϳɽk�����а�������ӡ�Ӣ��
���P����7412018-01-05
Photoshop�ϳɽk�����а�������ӡ�Ӣ��
���P����7412018-01-05
-
 Photoshop�ϳɿֲ���Ч���fʥ������Ӣ��
���P����6702018-01-05
Photoshop�ϳɿֲ���Ч���fʥ������Ӣ��
���P����6702018-01-05
-
 Photoshop�ϳɱ�������ס��Ů����Ӣ��
���P����7152018-01-05
Photoshop�ϳɱ�������ס��Ů����Ӣ��
���P����7152018-01-05
-
 Photoshop�ϳ���������w�е���ʹ��Ӣ��
���P����4622017-12-25
Photoshop�ϳ���������w�е���ʹ��Ӣ��
���P����4622017-12-25
-
 Photoshop�ϳɳ��б����ǹ��������Ӣ��
���P����7142017-12-12
Photoshop�ϳɳ��б����ǹ��������Ӣ��
���P����7142017-12-12
