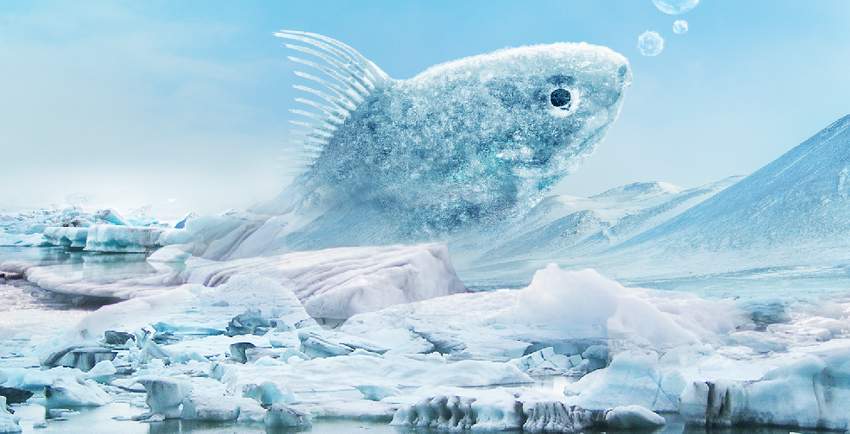
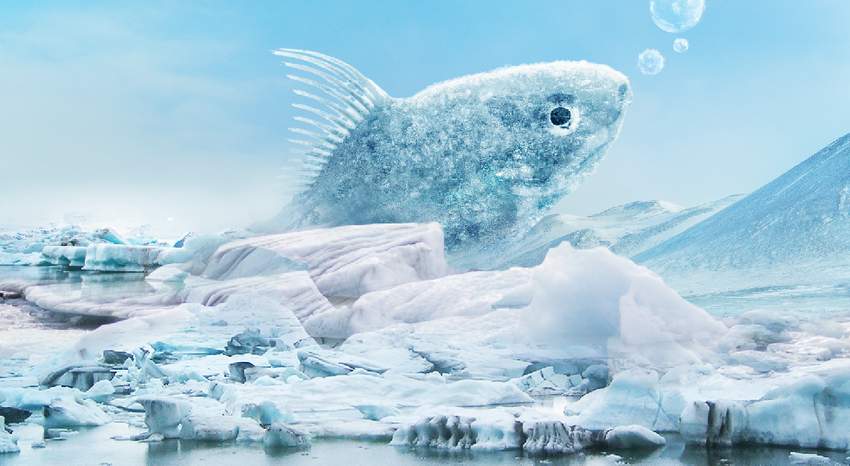
Photoshop�ϳɱ�����Ч�Ľ��~(y��)��(ch��ng)����Ӣ��(5)
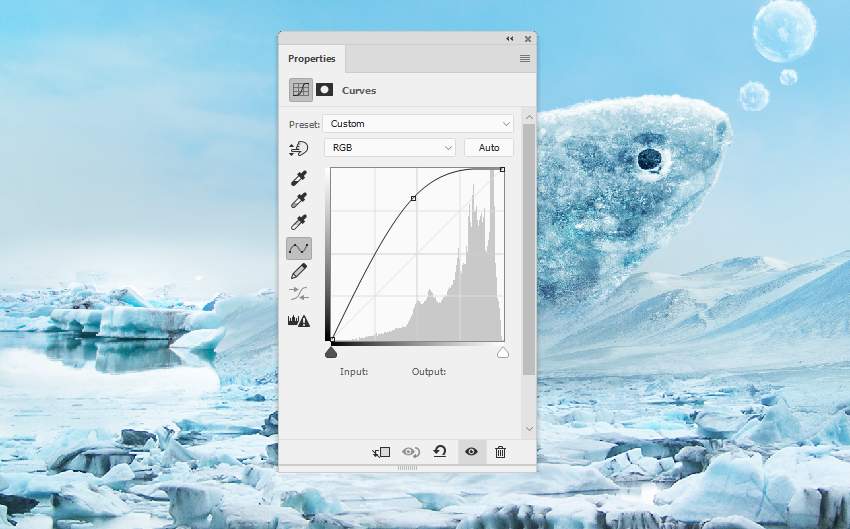
����(l��i)Դ�� Tutsplus.com�����x���� Jenny Le �o�҂�����(l��i)��(j��ng)���ʵ����£�Step 2
Use a Curves adjustment layer to bring more light to this area.
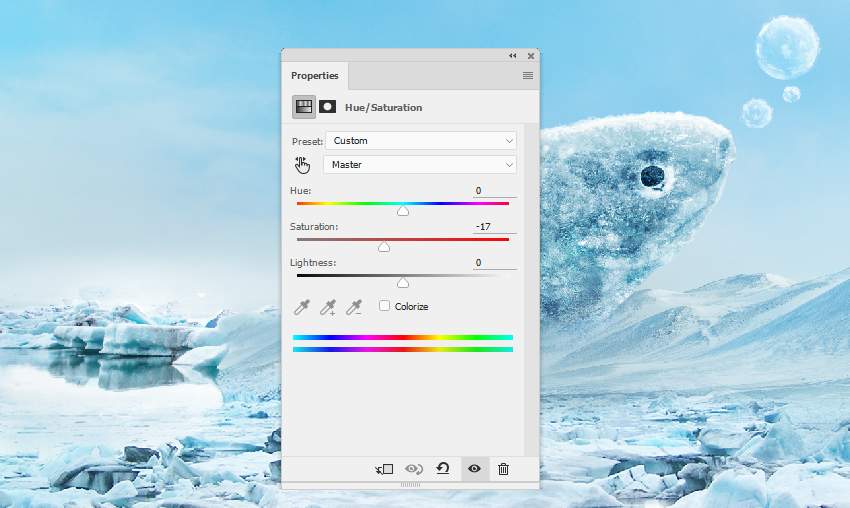
Step 3
Add a Hue/Saturation adjustment layer to desaturate the ice's color a little.
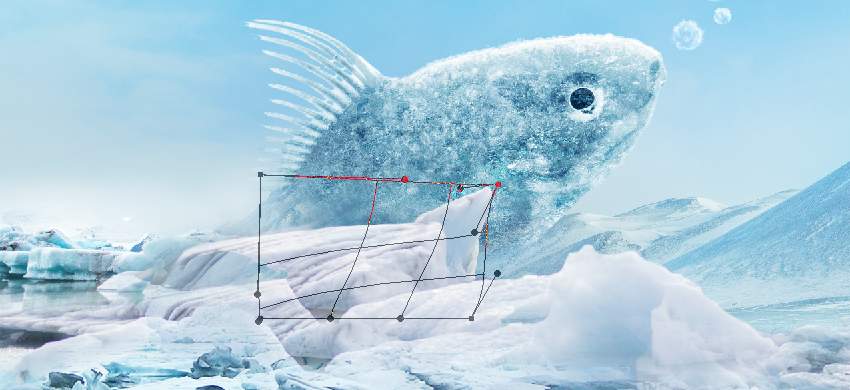
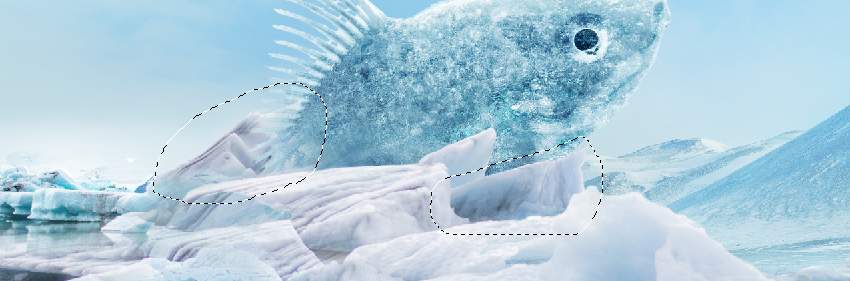
Step 4
Place the ice 3 image over the main document and use a layer mask with a medium-hard black brush to remove the foreground and background, leaving some ice visible around the fish and the midground.
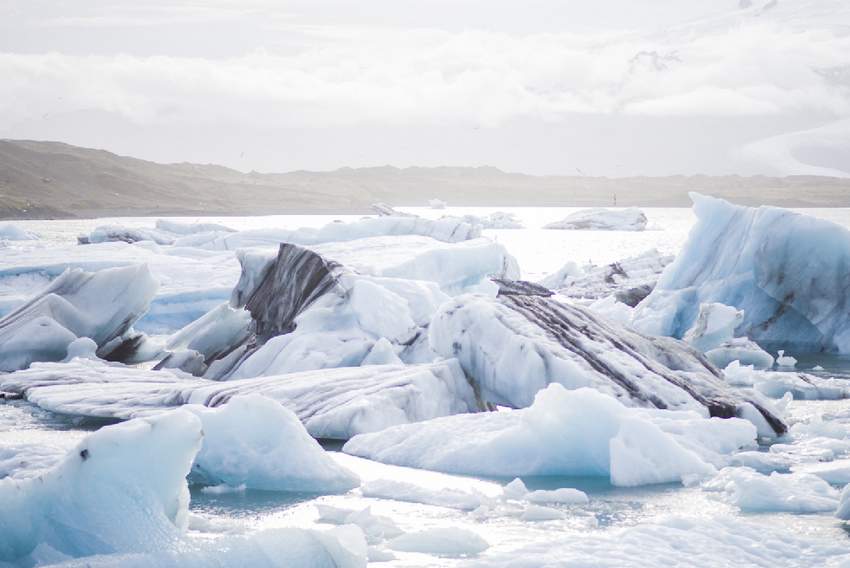
Step 5
Duplicate this layer and resize it to be larger. Move it up a bit and use a layer mask to show some bigger ice around the fish.

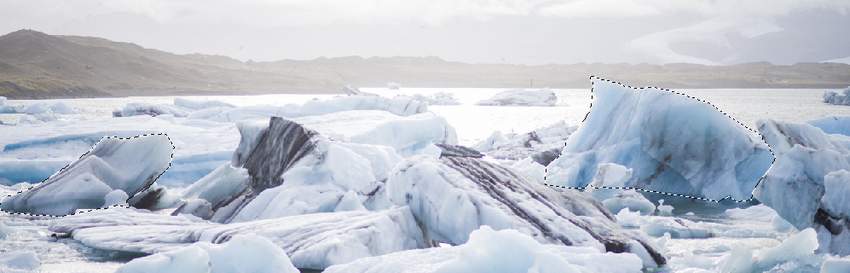
Step 6
Select an ice part from the original image and add it near the fish. Use the Free Transform Tool (Control-T)with the Warp mode to tweak it a little. Set this layer below the two previous ones.
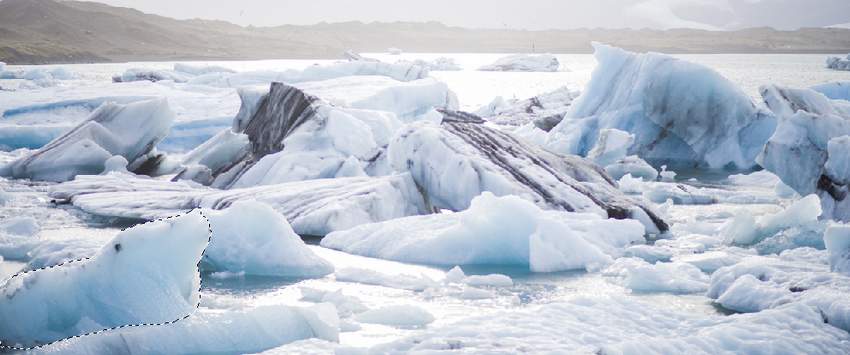
Step 7
Take other ice parts to add around the fish. Use a layer mask for each of these layers to remove the hard edges and blend them with the existing ground. Mask off the one on the fish's tail so it appears behind the fish.
 ��ǵ���
-
 Photoshop������(f��)���L(f��ng)�������ƬЧ����Ӣ��2018-04-23
-
 Photoshop�ϳ��L(zh��ng)����(chu��ng)����(sh��)���L(zh��ng)�i¹��Ӣ��2018-04-23
-
 Photoshop�ϳɱ�����Ч�Ľ��~(y��)��(ch��ng)����Ӣ��2018-02-10
-
 Photoshop�ϳɉ�(m��ng)���L(f��ng)���ɭ�ֈ�(ch��ng)����Ӣ��2018-02-10
-
 Photoshop�ϳ�����ʩ��������Ӣ��2018-02-10
-
 Photoshop���������|(zh��)�е�3D���w�֡�Ӣ��2018-01-09
-
 Photoshop�O(sh��)Ӌ(j��)����ȼ��ˇ�g(sh��)�ֽ̡̳�Ӣ��2018-01-09
-
Photoshop�ϳ��L(zh��ng)����(chu��ng)����(sh��)���L(zh��ng)�i¹��Ӣ��
���P(gu��n)����13832018-04-23
-
Photoshop�ϳɉ�(m��ng)���L(f��ng)���ɭ�ֈ�(ch��ng)����Ӣ��
���P(gu��n)����24492018-02-10
-
Photoshop�ϳ�����ʩ��������Ӣ��
���P(gu��n)����8372018-02-10
-
 Photoshop�ϳɽk�����а�������ӡ�Ӣ��
���P(gu��n)����7412018-01-05
Photoshop�ϳɽk�����а�������ӡ�Ӣ��
���P(gu��n)����7412018-01-05
-
 Photoshop�ϳɿֲ���Ч���f(w��n)ʥ��(ji��)����Ӣ��
���P(gu��n)����6702018-01-05
Photoshop�ϳɿֲ���Ч���f(w��n)ʥ��(ji��)����Ӣ��
���P(gu��n)����6702018-01-05
-
 Photoshop�ϳɱ���(sh��)����ס��Ů����Ӣ��
���P(gu��n)����7152018-01-05
Photoshop�ϳɱ���(sh��)����ס��Ů����Ӣ��
���P(gu��n)����7152018-01-05
-
 Photoshop�ϳ���������w�е���ʹ��Ӣ��
���P(gu��n)����4622017-12-25
Photoshop�ϳ���������w�е���ʹ��Ӣ��
���P(gu��n)����4622017-12-25
-
 Photoshop�ϳɳ��б����ǹ����(ch��ng)����Ӣ��
���P(gu��n)����7142017-12-12
Photoshop�ϳɳ��б����ǹ����(ch��ng)����Ӣ��
���P(gu��n)����7142017-12-12
