Photoshop�ϳɉ����L���ɭ�ֈ�����Ӣ��(5)
����Դ�� Tutsplus.com�����x���� Jenny Le �o�҂����������ʵ����£��OӋ�̳�/����̳�/����̳�2018-02-10
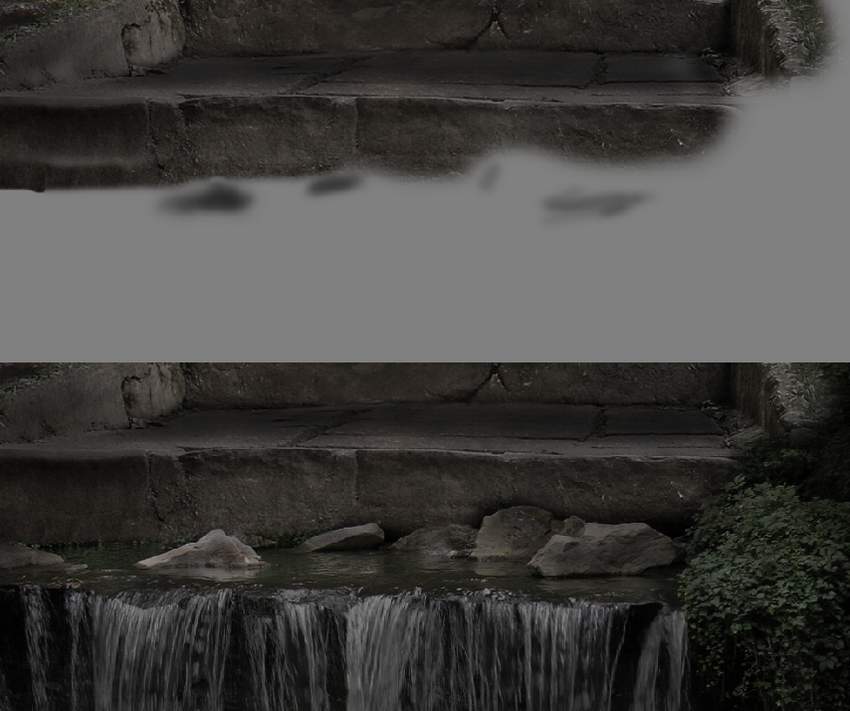
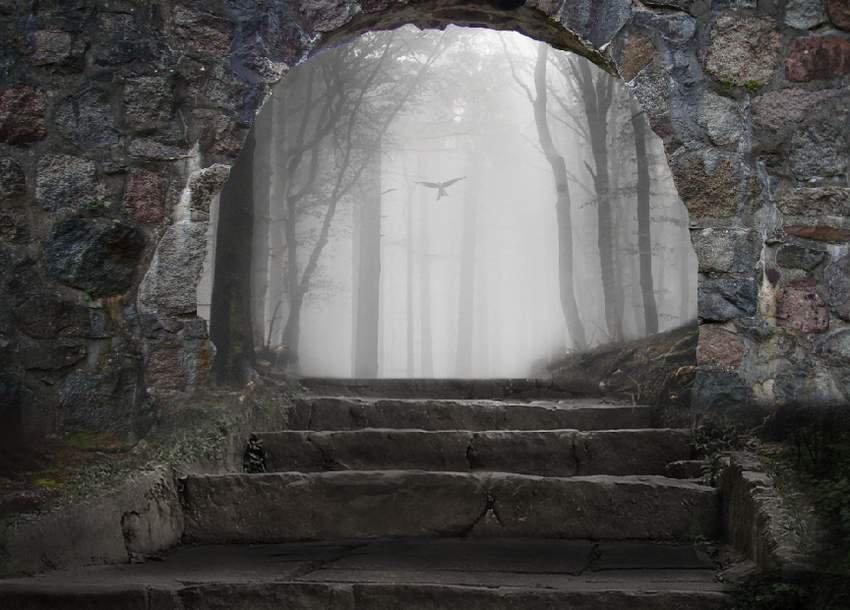
Step 4 Add a new layer, change the mode to Overlay 100%, and fill with 50% gray. Use the Burn Tool to darken the rocks more. 4. How to Add the Bird Step 1 Isolate the bird from the background and add
Step 4
Add a new layer, change the mode to Overlay 100%, and fill with 50% gray. Use the Burn Tool to darken the rocks more.
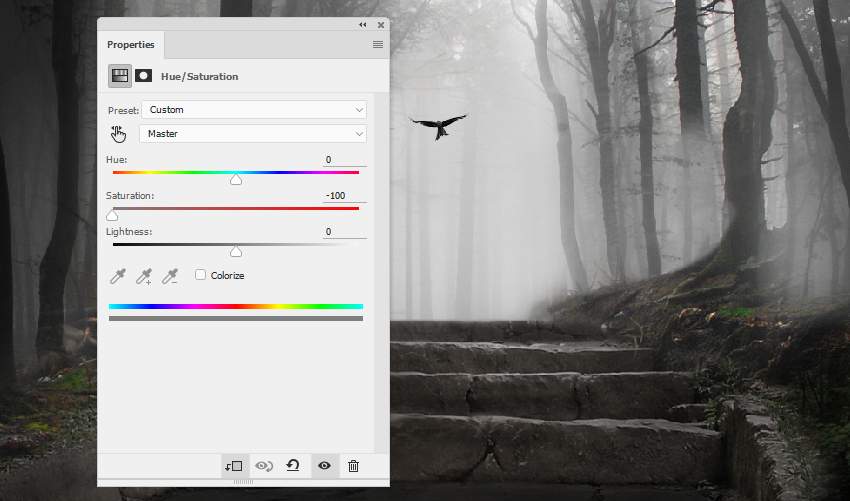
4. How to Add the Bird
Step 1
Isolate the bird from the background and add it to the upper middle section. Use the Free Transform Tool (Control-T) to make it much smaller to create an impression of distance.

Step 2
Create a Hue/Saturation adjustment layer to desaturate the bird.
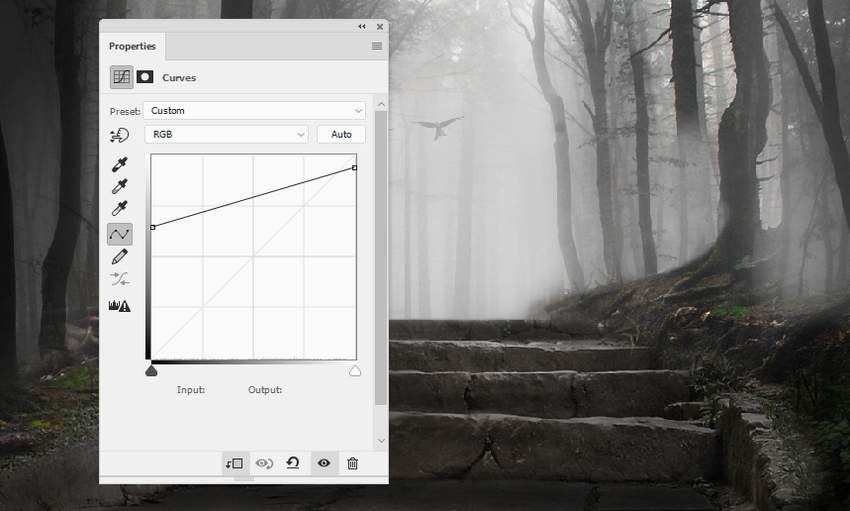
Step 3
Use a Curves adjustment layer to reduce the bird's visibility, making it fade out into the foggy background.
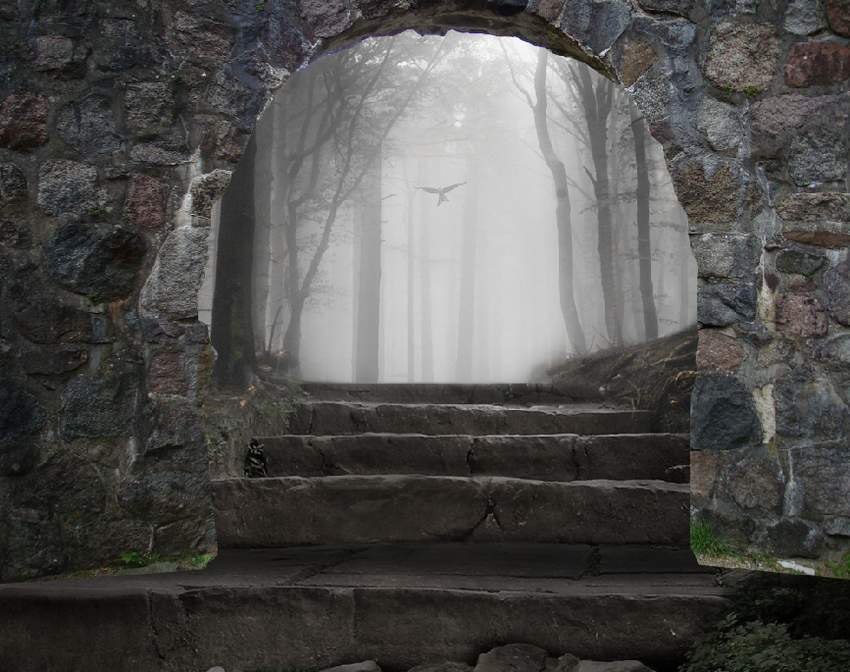
5. How to Retouch the Arch
Step 1
Cut out the arch from the original image and place it above the stairs. Use a layer mask to erase the bottom and blend it with the existing ground.
 ��ǵ���
���]����
-
 Photoshop�������L�������ƬЧ����Ӣ��2018-04-23
-
 Photoshop�ϳ��L����������L�i¹��Ӣ��2018-04-23
-
 Photoshop�ϳɱ�����Ч�Ľ��~������Ӣ��2018-02-10
-
 Photoshop�ϳɉ����L���ɭ�ֈ�����Ӣ��2018-02-10
-
 Photoshop�ϳ�����ʩ��������Ӣ��2018-02-10
-
 Photoshop���������|�е�3D���w�֡�Ӣ��2018-01-09
-
 Photoshop�OӋ����ȼ��ˇ�g�ֽ̡̳�Ӣ��2018-01-09
���T����
-
Photoshop�������L�������ƬЧ����Ӣ��
���P����11882018-04-23
-
Photoshop�ϳɱ�����Ч�Ľ��~������Ӣ��
���P����34052018-02-10
-
 Photoshop�ϳɳ��б����ǹ��������Ӣ��
���P����7142017-12-12
Photoshop�ϳɳ��б����ǹ��������Ӣ��
���P����7142017-12-12
-
 Photoshop�ϳɄ����Ӣ�ۑ����̡̳�Ӣ��
���P����5802017-12-12
Photoshop�ϳɄ����Ӣ�ۑ����̡̳�Ӣ��
���P����5802017-12-12
