Photoshop�ϳɉ����L���ɭ�ֈ�����Ӣ��(3)
����Դ�� Tutsplus.com�����x���� Jenny Le �o�҂����������ʵ����£�Step 8
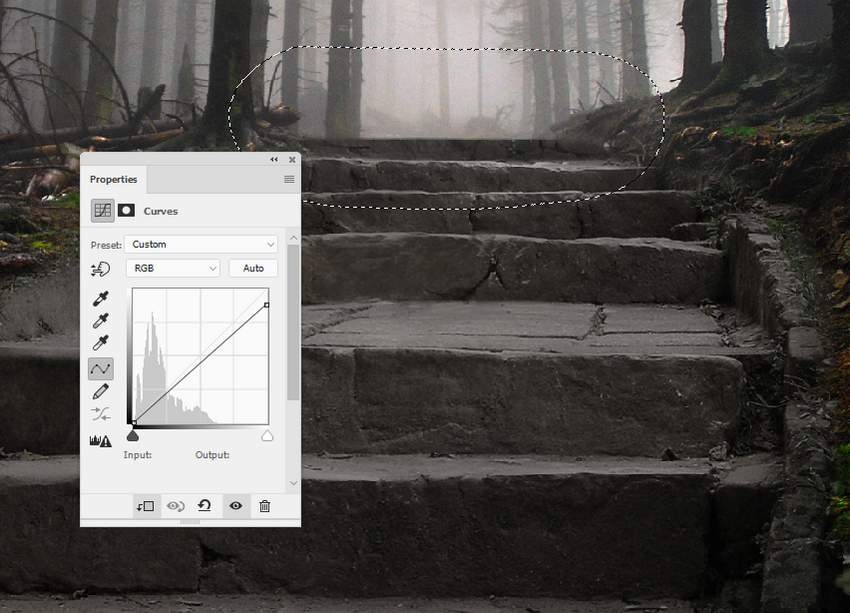
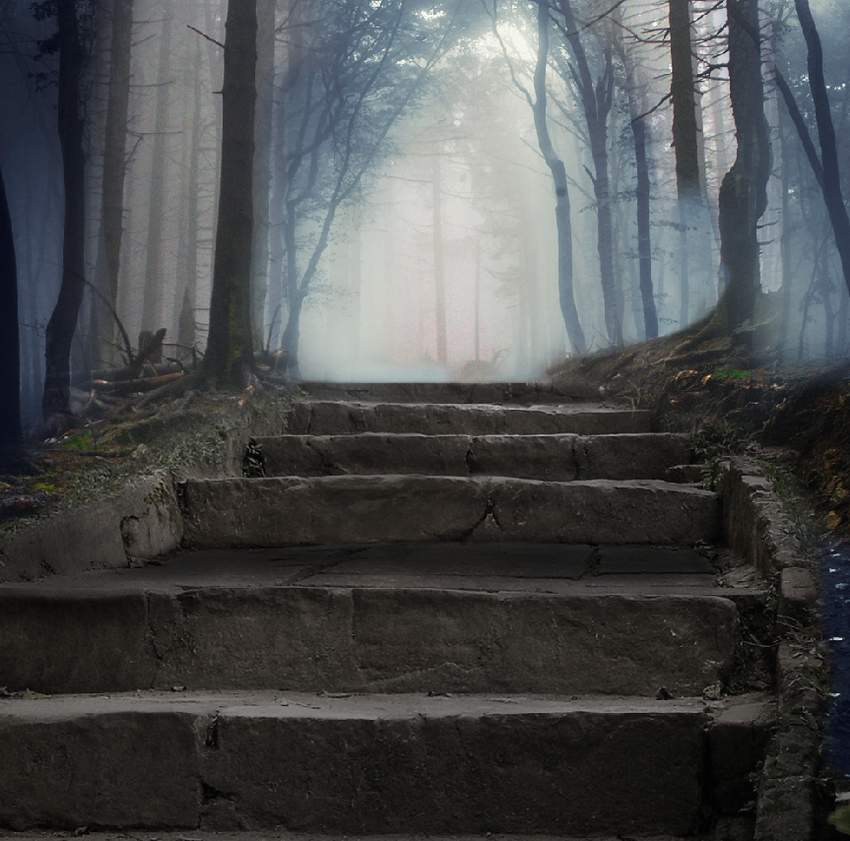
Create another Curves adjustment layer to reduce the light on the stairs again. On the layer mask, paint on the upper steps as they get more light from the background than the lower so should be a bit brighter.
Step 9
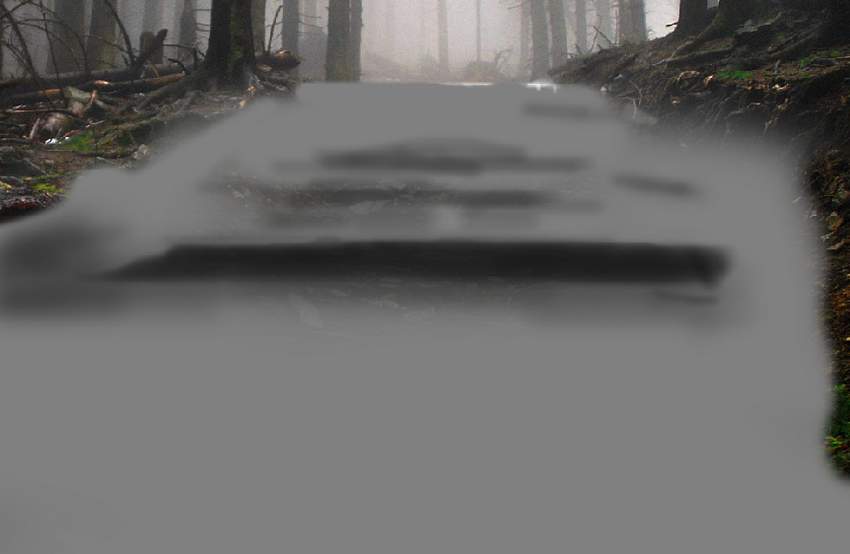
Add a new layer, change the mode to Overlay 100%, and fill with 50% gray.

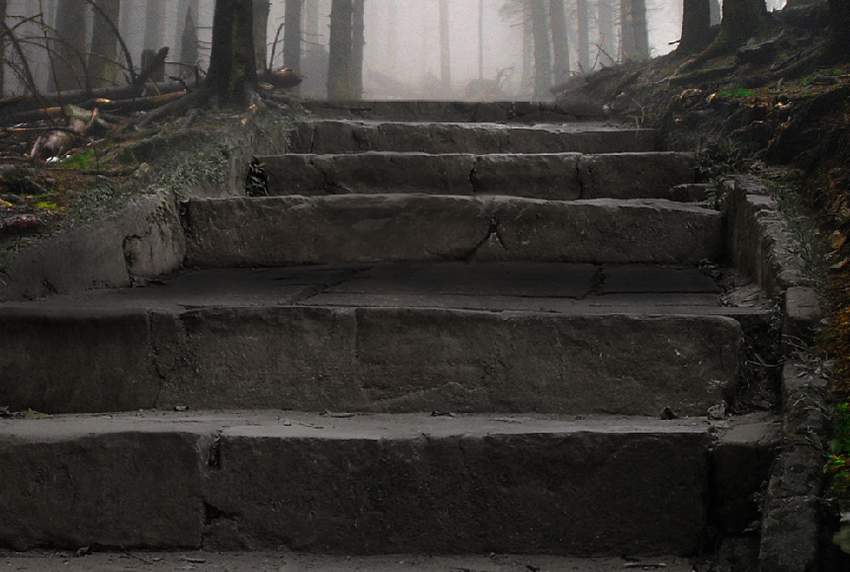
Activate the Dodge and Burn Tool (O) with Midtones Range, Exposure about 15-20% to brighten the highest step and darken the shadow area of the lower ones. Also paint the shadow for one of the lower steps. You can see how I did it with Normal mode and the result with Overlay mode.
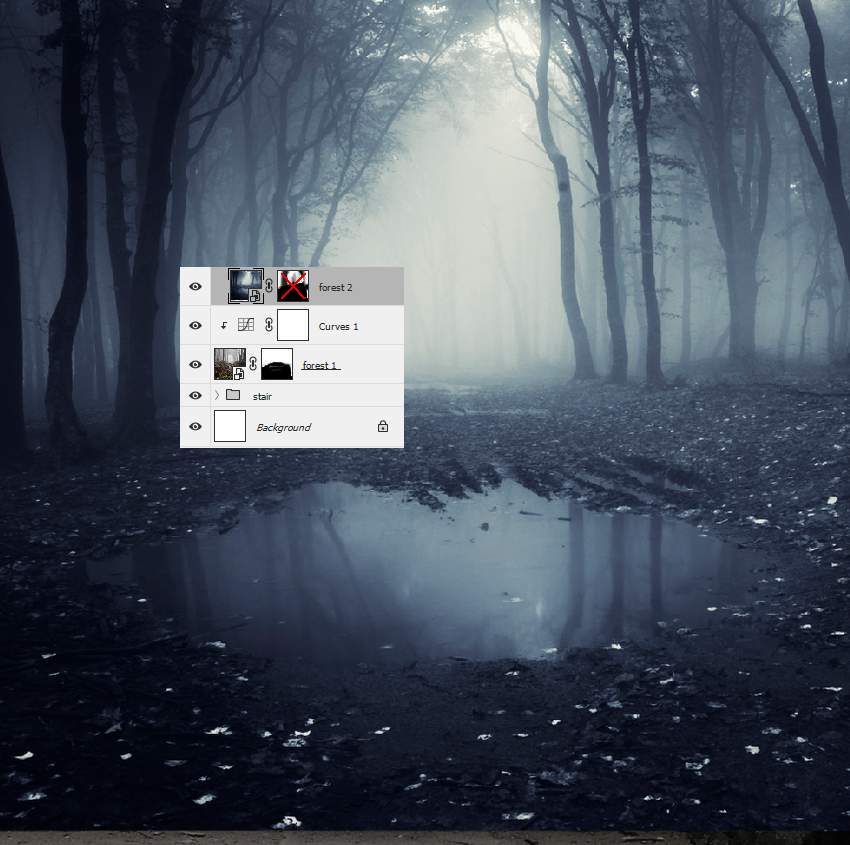
2. How to Complete the Forest Background
Step 1
Move the forest 2 image into our main document and add a mask to this layer. Use a soft black brush to remove the lower half, both sides, and the foggy middle area to leave a blended result like below:
 ��ǵ���
-
 Photoshop�������L�������ƬЧ����Ӣ��2018-04-23
-
 Photoshop�ϳ��L����������L�i¹��Ӣ��2018-04-23
-
 Photoshop�ϳɱ�����Ч�Ľ��~������Ӣ��2018-02-10
-
 Photoshop�ϳɉ����L���ɭ�ֈ�����Ӣ��2018-02-10
-
 Photoshop�ϳ�����ʩ��������Ӣ��2018-02-10
-
 Photoshop���������|�е�3D���w�֡�Ӣ��2018-01-09
-
 Photoshop�OӋ����ȼ��ˇ�g�ֽ̡̳�Ӣ��2018-01-09
-
Photoshop�������L�������ƬЧ����Ӣ��
���P����11882018-04-23
-
Photoshop�ϳɱ�����Ч�Ľ��~������Ӣ��
���P����34052018-02-10
-
 Photoshop�ϳɳ��б����ǹ��������Ӣ��
���P����7142017-12-12
Photoshop�ϳɳ��б����ǹ��������Ӣ��
���P����7142017-12-12
-
 Photoshop�ϳɄ����Ӣ�ۑ����̡̳�Ӣ��
���P����5802017-12-12
Photoshop�ϳɄ����Ӣ�ۑ����̡̳�Ӣ��
���P����5802017-12-12
