Photoshop�ϳɉ����L(f��ng)���ɭ�ֈ�����Ӣ��(4)
����Դ�� Tutsplus.com�����x���� Jenny Le �o�҂�������(j��ng)���ʵ����£�Step 2
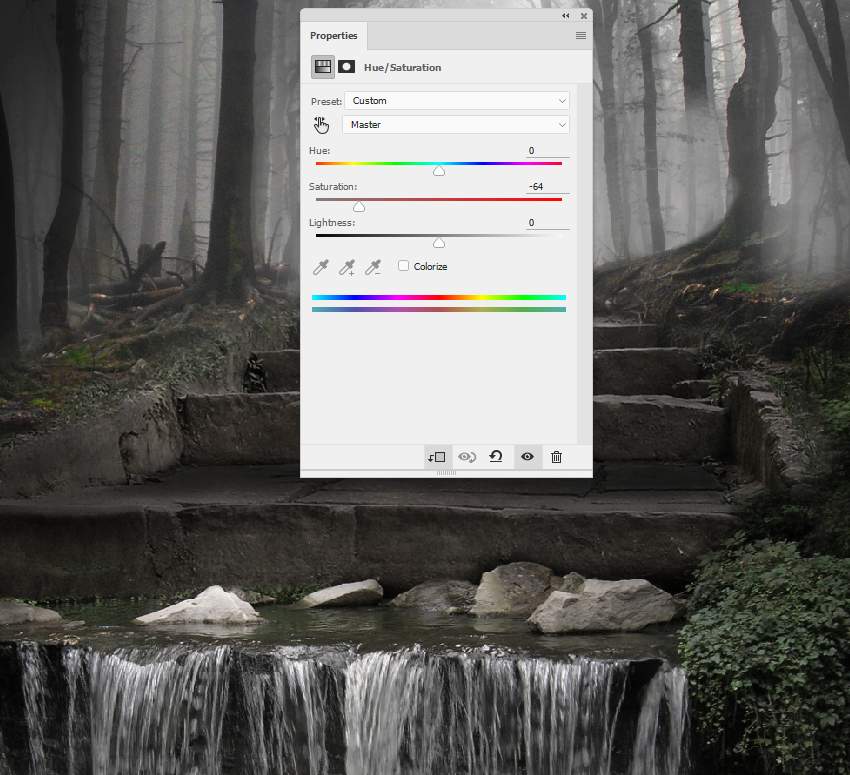
Add a Hue/Saturation adjustment layer and reduce the Saturation value to the maximum.

Step 3
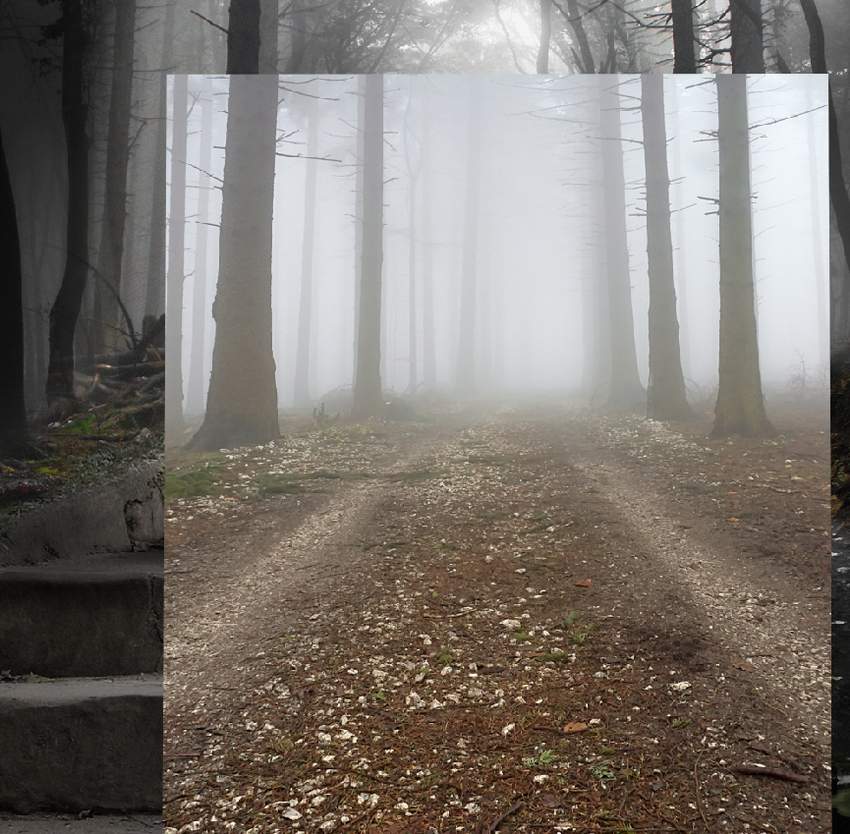
Add the forest 3 image to our canvas and set the far foggy background to the middle section of the existing forest. Use a layer mask to leave only the foggy area visible.
Step 4
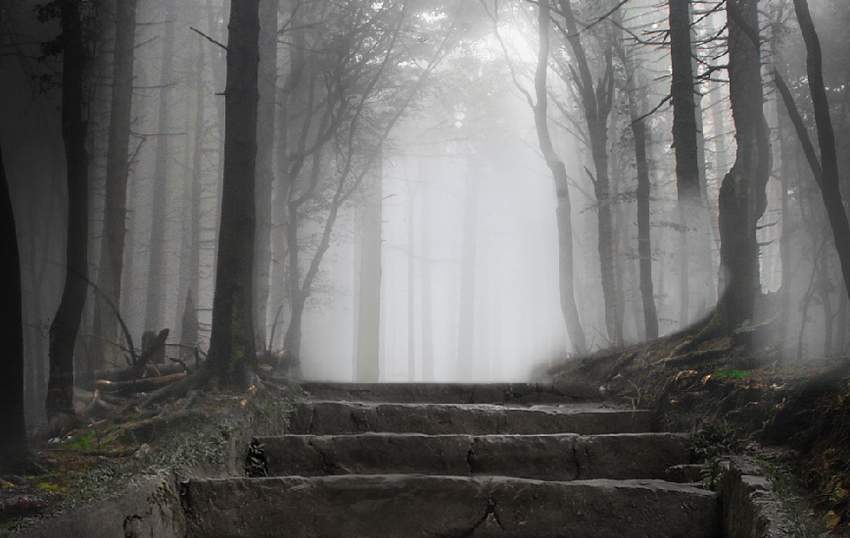
Create a Hue/Saturation adjustment layer and bring the Saturation value down to -100:

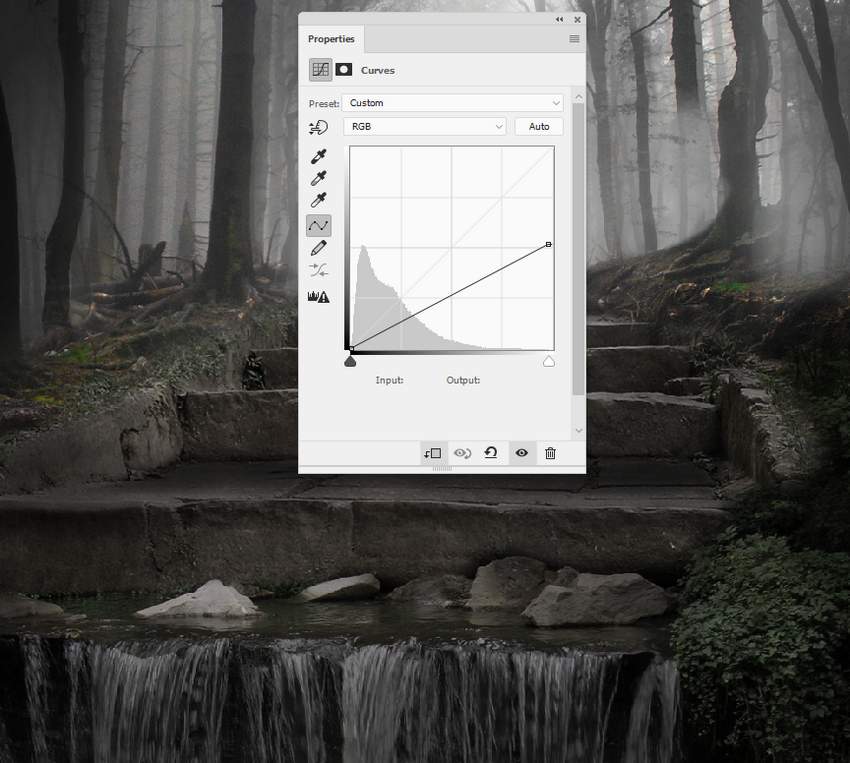
Step 5
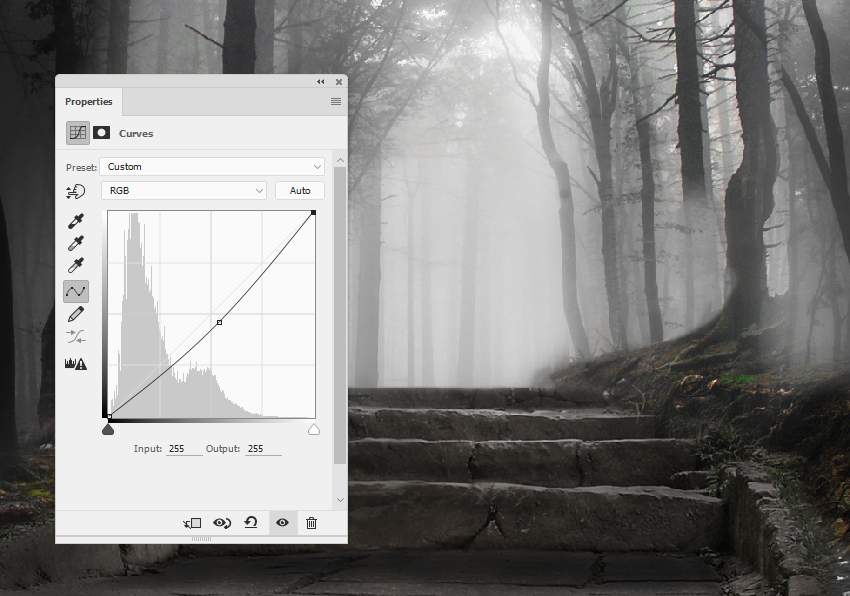
Make a Curves adjustment layer to darken this part of the forest a little.
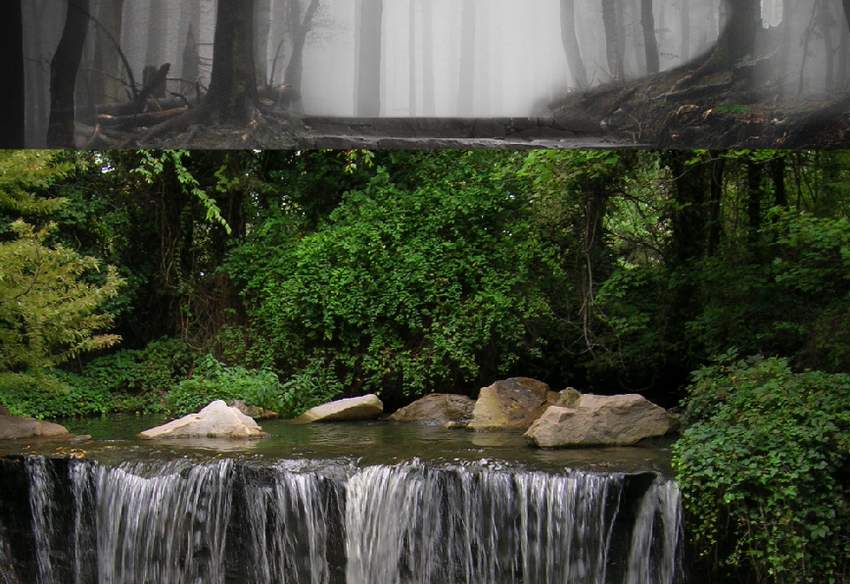
3. How to Import the Stream
Step 1
Add the stream image to the lowest area of the scene and flip it horizontally (Edit > Transform > Flip Horizontal). Use a layer mask to mask off the top, leaving the stream with the rocks and lower vines visible.
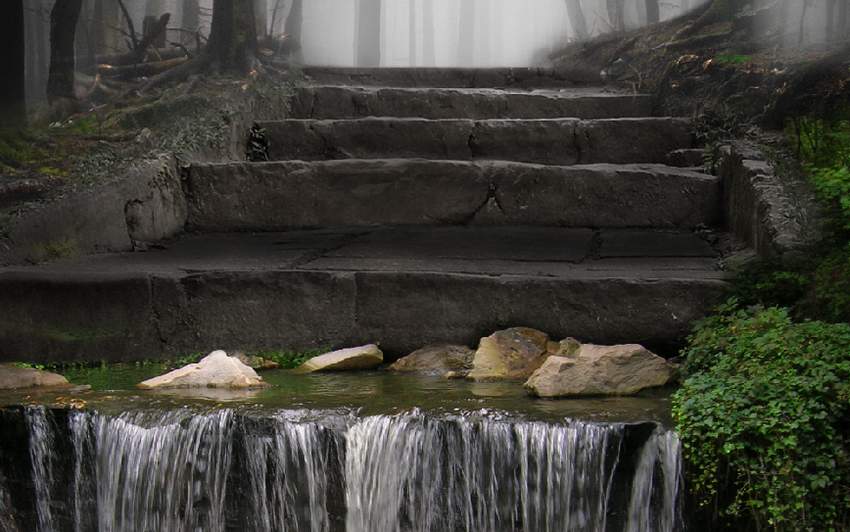
Step 2
Create a Hue/Saturation adjustment layer to desaturate the stream, rocks, and vines.
Step 3
Make a Curves adjustment layer to reduce the lightness of the stream.
 ��ǵ���
-
 Photoshop������(f��)���L(f��ng)�������ƬЧ����Ӣ��2018-04-23
-
 Photoshop�ϳ��L����(chu��ng)������L�i¹��Ӣ��2018-04-23
-
 Photoshop�ϳɱ�����Ч�Ľ��~������Ӣ��2018-02-10
-
 Photoshop�ϳɉ����L(f��ng)���ɭ�ֈ�����Ӣ��2018-02-10
-
 Photoshop�ϳ�����ʩ��������Ӣ��2018-02-10
-
 Photoshop���������|(zh��)�е�3D���w�֡�Ӣ��2018-01-09
-
 Photoshop�O(sh��)Ӌ����ȼ��ˇ�g(sh��)�ֽ̡̳�Ӣ��2018-01-09
-
Photoshop������(f��)���L(f��ng)�������ƬЧ����Ӣ��
���P(gu��n)����11882018-04-23
-
Photoshop�ϳɱ�����Ч�Ľ��~������Ӣ��
���P(gu��n)����34052018-02-10
-
 Photoshop�ϳɳ��б����ǹ��������Ӣ��
���P(gu��n)����7142017-12-12
Photoshop�ϳɳ��б����ǹ��������Ӣ��
���P(gu��n)����7142017-12-12
-
 Photoshop�ϳɄ�(chu��ng)���Ӣ�ۑ�(zh��n)�������̡̳�Ӣ��
���P(gu��n)����5802017-12-12
Photoshop�ϳɄ�(chu��ng)���Ӣ�ۑ�(zh��n)�������̡̳�Ӣ��
���P(gu��n)����5802017-12-12
