Photoshop�ϳɽk�����а�������ӡ�Ӣ��(5)
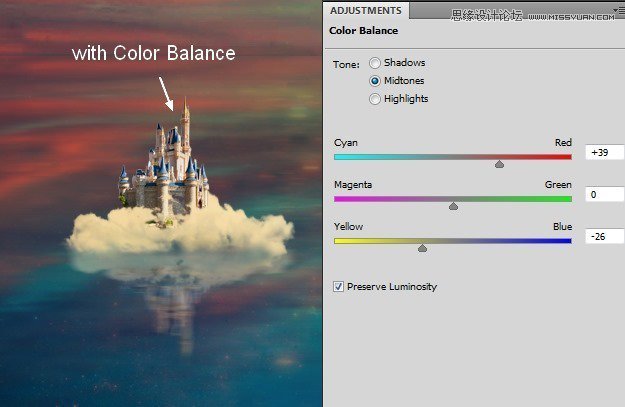
����Դ�� photoshoptutorials�����x���� Jenny Le �o�҂����������ʵ����£�Step 35
Group the castle and its reflection layers. Use Color Balance to add some warm color to them:
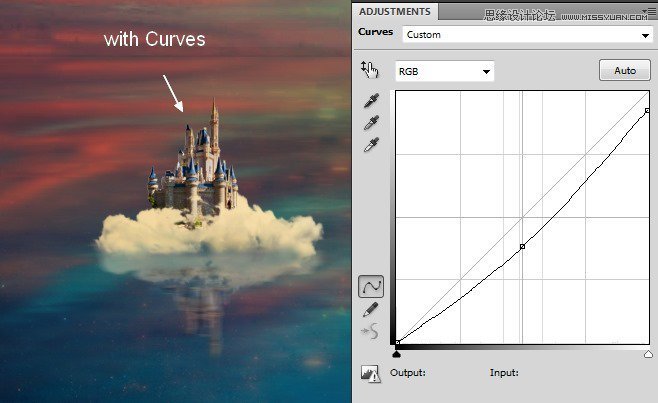
Step 36
Use a Curves adjustment layer to darken them a little:
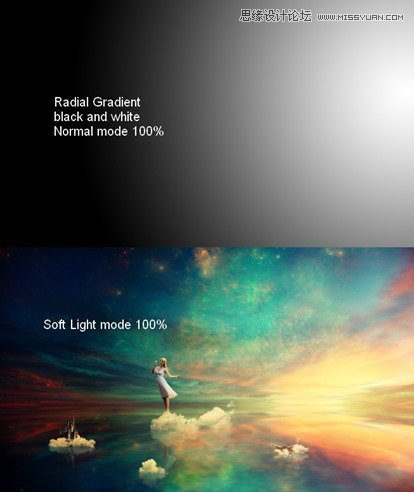
Step 37
To change the contrast of the whole scene, make a new layer on the top . Active the Gradient Tool (G), choose Radial Gradient with default colors (black and white). Change the mode to Soft Light 100%:
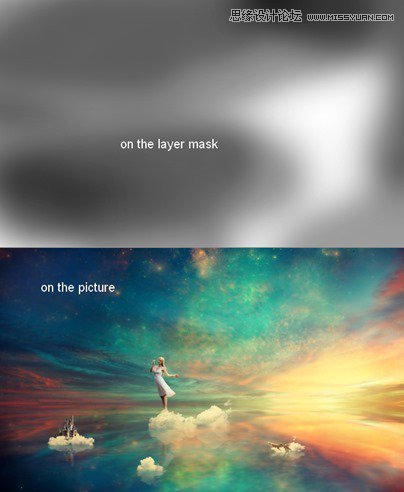
Apply layer mask to refine the contrast of the image:
Step 38
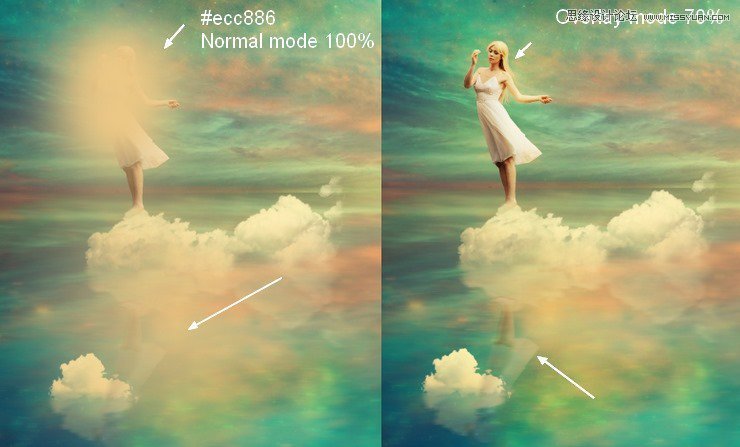
In this step I use a soft brush with the color #ecc886 to paint over the model and her reflection to give them a glowing effect. Change the mode to Overlay 70%:
Step 39
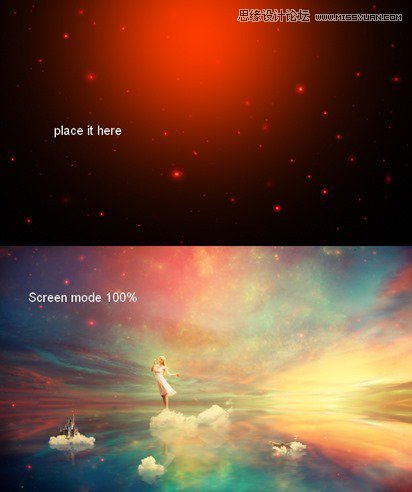
Open the light 1 images pack. I chose “starry4” to cover the working image then set the mode to Screen 100%:
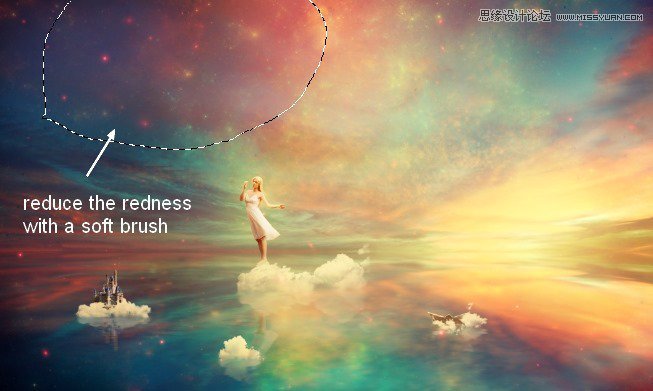
Use a soft brush with opacity about 20-25% to reduce the red effect on the top of the scene:
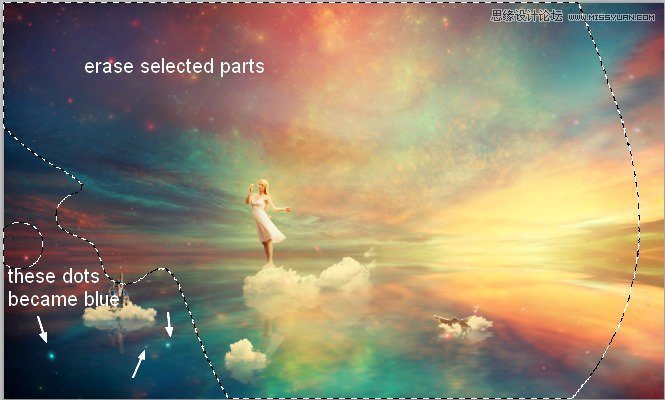
Step 40
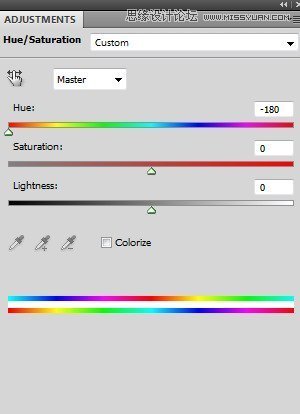
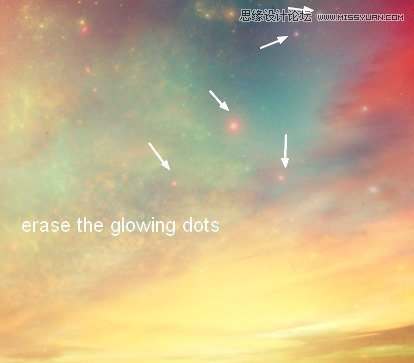
I used Hue/Saturation to turn some of the glowing dots on the lake into blue:
Erase the higher parts to keep their color as before adding Hue/Saturation:
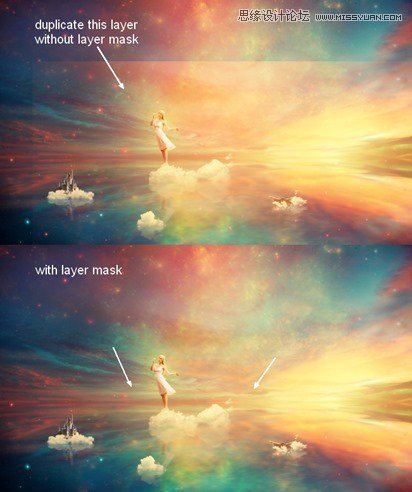
Step 41
Duplicate this light layer and lower its position at the center. Apply layer mask to smoothly blend it with the scene: :
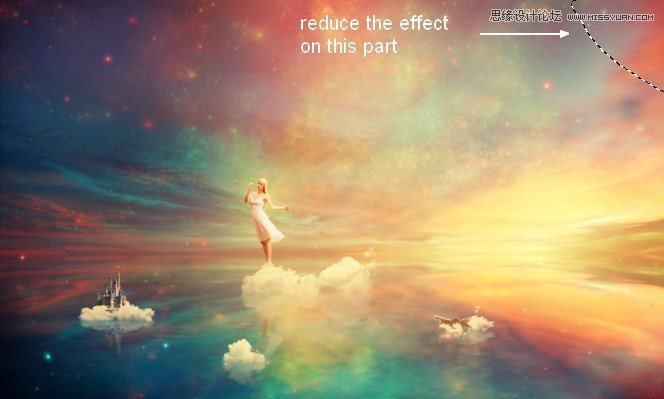
Step 42
After duplicating it again , move it to the top right and erase gently this effect with layer mask:
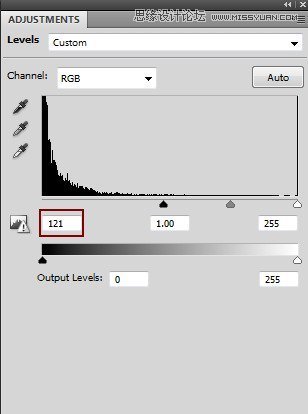
I used a Levels adjustment layer to reduce the saturation of this part:
On its layer mask use a soft brush to erase some of the glowing dots :
Step 43
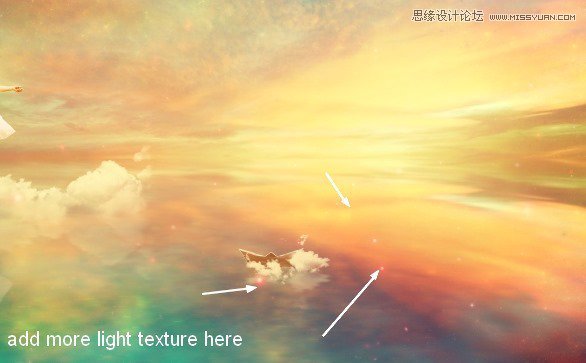
Add this texture to the part around the paper boat:
 ���㲻Ҫ��
-
 Photoshop�������L�������ƬЧ����Ӣ��2018-04-23
-
 Photoshop�ϳ��L����������L�i¹��Ӣ��2018-04-23
-
 Photoshop�ϳɱ�����Ч�Ľ��~������Ӣ��2018-02-10
-
 Photoshop�ϳɉ����L���ɭ�ֈ�����Ӣ��2018-02-10
-
 Photoshop�ϳ�����ʩ��������Ӣ��2018-02-10
-
 Photoshop���������|�е�3D���w�֡�Ӣ��2018-01-09
-
 Photoshop�OӋ����ȼ��ˇ�g�ֽ̡̳�Ӣ��2018-01-09
-
Photoshop�������L�������ƬЧ����Ӣ��
���P����11882018-04-23
-
Photoshop�ϳ��L����������L�i¹��Ӣ��
���P����13832018-04-23
-
Photoshop�ϳɱ�����Ч�Ľ��~������Ӣ��
���P����34052018-02-10
-
 Photoshop�����S���|�����w�֡�Ӣ��
���P����7422018-02-10
Photoshop�����S���|�����w�֡�Ӣ��
���P����7422018-02-10
-
 Photoshop�����@�G����3D���w��
���P����14682018-02-10
Photoshop�����@�G����3D���w��
���P����14682018-02-10
-
Photoshop�ϳɉ����L���ɭ�ֈ�����Ӣ��
���P����24492018-02-10
-
Photoshop�ϳ�����ʩ��������Ӣ��
���P����8372018-02-10
-
 Photoshop�������p���ع����w
���P����6532018-01-09
Photoshop�������p���ع����w
���P����6532018-01-09
