Photoshop�ϳɽk�����а�������ӡ�Ӣ��(4)
����Դ�� photoshoptutorials�����x���� Jenny Le �o�҂�������(j��ng)���ʵ����£�Step 27
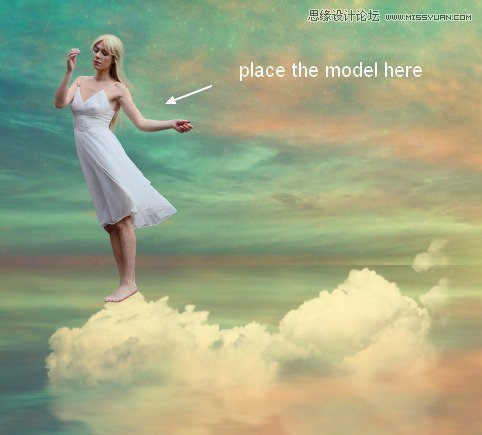
Place the model onto the biggest cloud (at the center):
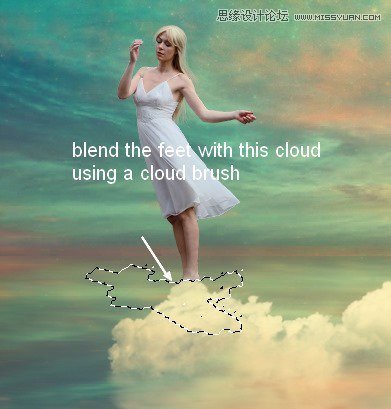
Use layer mask with a cloud brush to blend the model legs with this cloud:
Step 28
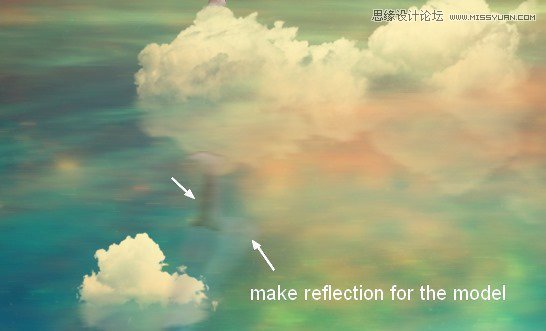
Make reflection for the model as done with the others.
Step 29
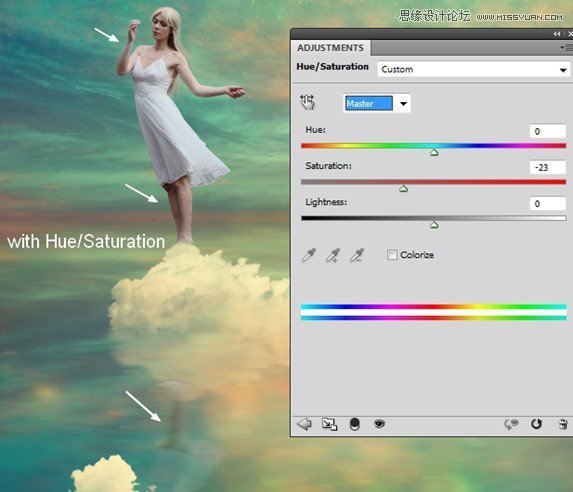
Group the model and her reflection layers. Make a Hue/Saturation adjustment layer within this group to reduce the redness on two these layers:
Step 30
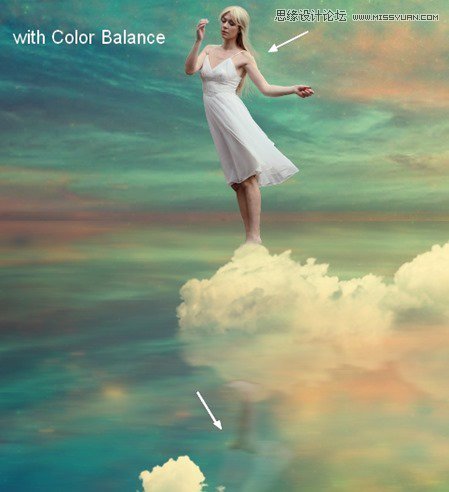
Use Color Balance to add some vibrant yellow to the model:

Step 31
I used Curves to darken the front of the model then erase the rest of hers to keep its brightness:

Step 32
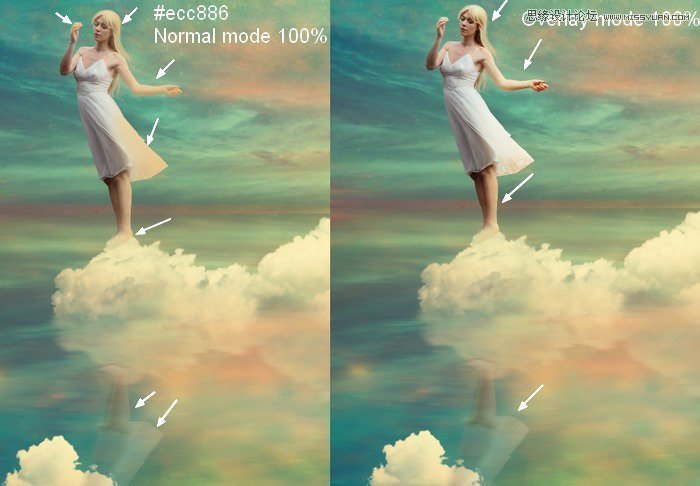
To add some bright yellow light of the scene reflected on the model and her reflection I made a new layer, used a soft brush with color #ecc886 to paint on the right of them. Change the mode of this layer to Overlay 100%:
Step 33
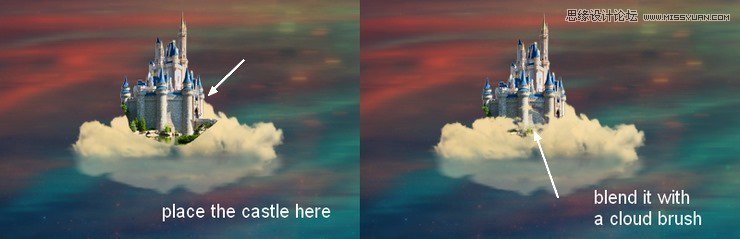
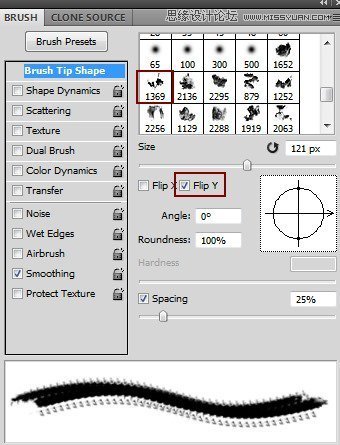
Cut out the castle and place it onto a left cloud. Pick a cloud brush (I chose the number 1369) to blend this castle with the cloud:
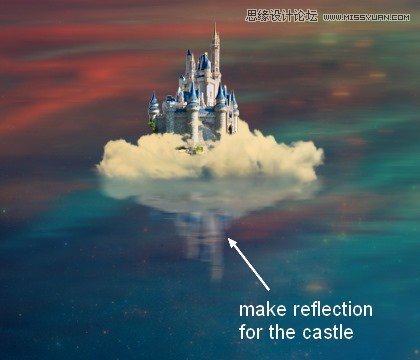
Make reflection for this castle as done with another elements:
Step 34
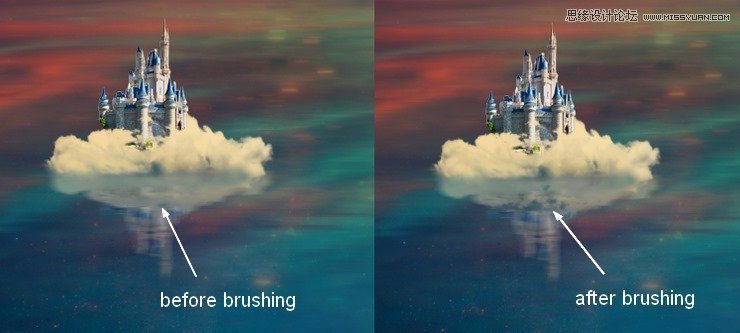
Now come back to the clouds group. Select the mask of the cloud’s reflection mentioned in previous step. Choose the cloud brush you used to mask off the castle and press F5 to flip its position:
Paint on the top of this reflection to create a likeness between this cloud and its reflection through the lake:
 ���㲻Ҫ��
-
 Photoshop������(f��)���L(f��ng)�������ƬЧ����Ӣ��2018-04-23
-
 Photoshop�ϳ��L����(chu��ng)������L�i¹��Ӣ��2018-04-23
-
 Photoshop�ϳɱ�����Ч�Ľ��~������Ӣ��2018-02-10
-
 Photoshop�ϳɉ����L(f��ng)���ɭ�ֈ�����Ӣ��2018-02-10
-
 Photoshop�ϳ�����ʩ��������Ӣ��2018-02-10
-
 Photoshop���������|(zh��)�е�3D���w�֡�Ӣ��2018-01-09
-
 Photoshop�O(sh��)Ӌ����ȼ��ˇ�g(sh��)�ֽ̡̳�Ӣ��2018-01-09
-
Photoshop������(f��)���L(f��ng)�������ƬЧ����Ӣ��
���P(gu��n)����11882018-04-23
-
Photoshop�ϳ��L����(chu��ng)������L�i¹��Ӣ��
���P(gu��n)����13832018-04-23
-
Photoshop�ϳɱ�����Ч�Ľ��~������Ӣ��
���P(gu��n)����34052018-02-10
-
 Photoshop�����S���|(zh��)�����w�֡�Ӣ��
���P(gu��n)����7422018-02-10
Photoshop�����S���|(zh��)�����w�֡�Ӣ��
���P(gu��n)����7422018-02-10
-
 Photoshop�����@�G����3D���w��
���P(gu��n)����14682018-02-10
Photoshop�����@�G����3D���w��
���P(gu��n)����14682018-02-10
-
Photoshop�ϳɉ����L(f��ng)���ɭ�ֈ�����Ӣ��
���P(gu��n)����24492018-02-10
-
Photoshop�ϳ�����ʩ��������Ӣ��
���P(gu��n)����8372018-02-10
-
 Photoshop������(f��)���p���ع����w
���P(gu��n)����6532018-01-09
Photoshop������(f��)���p���ع����w
���P(gu��n)����6532018-01-09
