Photoshop�ϳɽk�����а�������ӡ�Ӣ��(2)
����Դ�� photoshoptutorials�����x���� Jenny Le �o�҂�������(j��ng)���ʵ����£�Step 8
Place the nebula 1 image over the picture, then change the mode to Hard Light 100%:
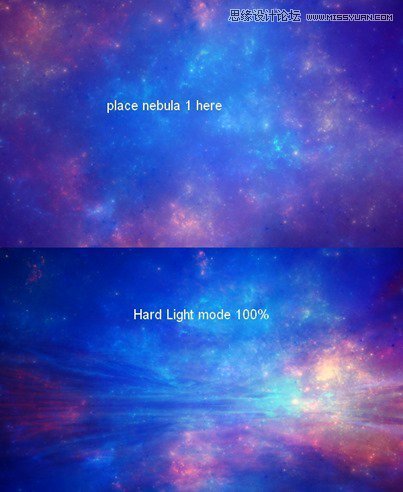
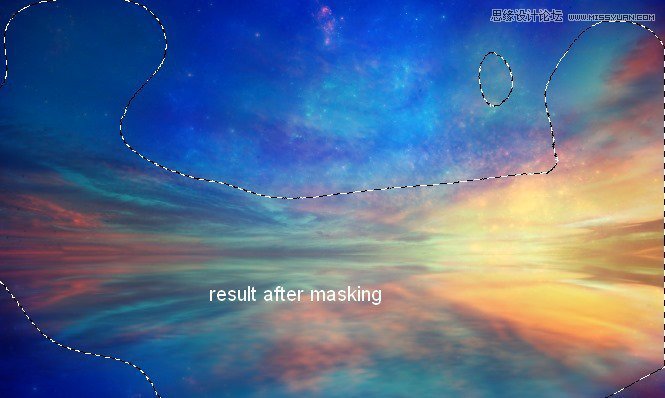
Add layer mask to this one. Use a soft brush to reduce the nebula effect in the sky and on the lake:
Step 9
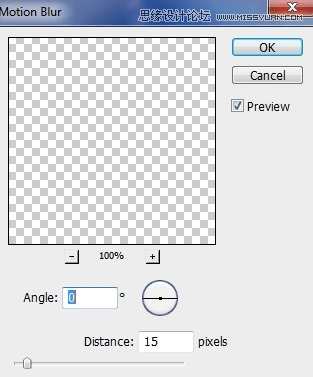
Duplicate this layer, flip it vertically and move it down to create reflection for this nebula effect:

Apply Motion Blur to this layer:

Step 10
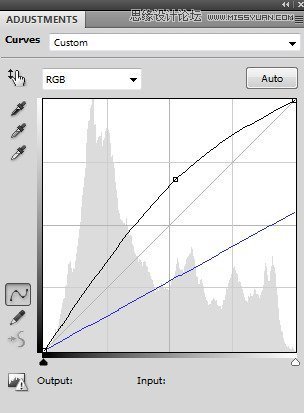
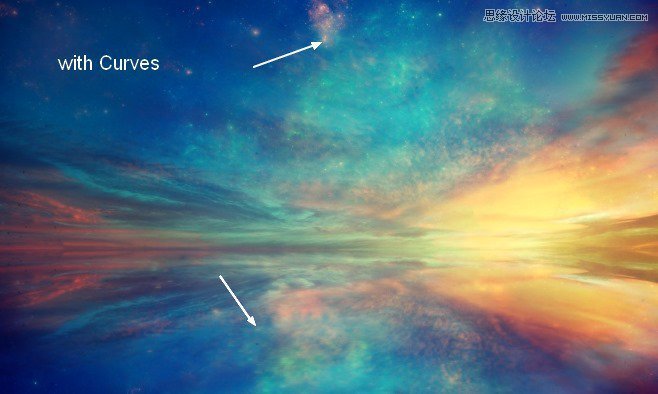
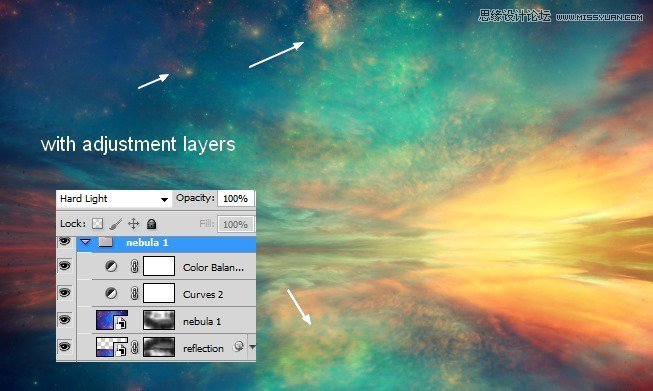
Make the nebula 1 layer and its reflection selected then press Cmd/Ctrl+G to create a group for them. Change the mode of this group from Pass Through (default group mode) to Hard Light 100%. Make a Curves adjustment layer on the top of the layers within this group to change the color of the nebula effect:
Step 11
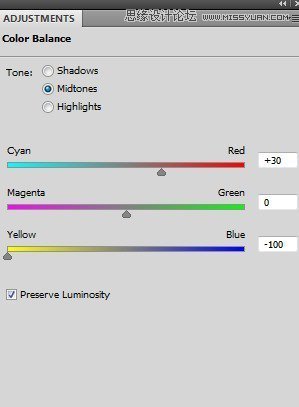
I used a Color Balance adjustment layer to make this effect more vibrant:
Step 12
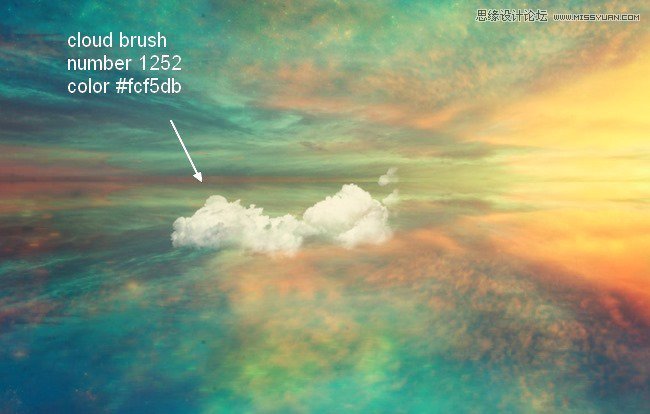
Make a new layer on the top (above the nebula 1 group). Change the brush to the cloud ones. I used number 1252, color #fcf5db to paint a cloud at the middle section of the lake:
Step 13
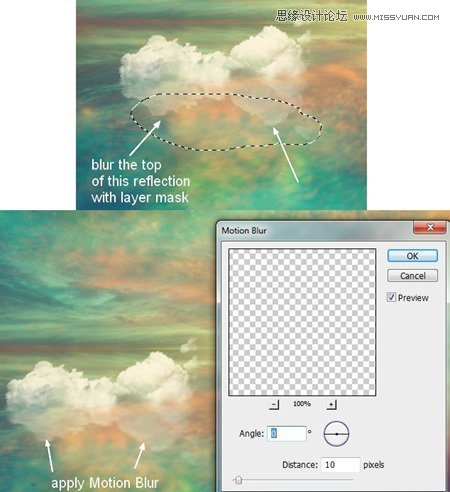
Duplicate this layer, move the lower down to make reflection for this cloud after flipping it vertically. Lower the opacity of this reflection layer to 50%:

Use layer mask to reduce the top of this reflection then apply Motion Blur :
Step 14
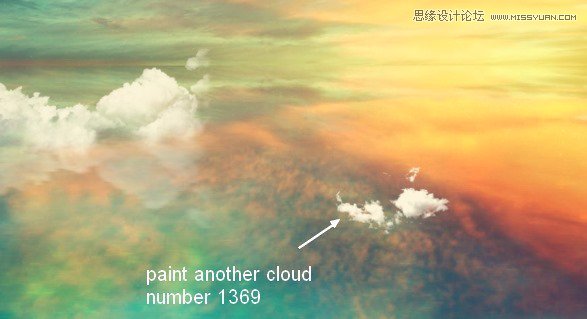
I painted another cloud (number 1369) at the right of the first one:
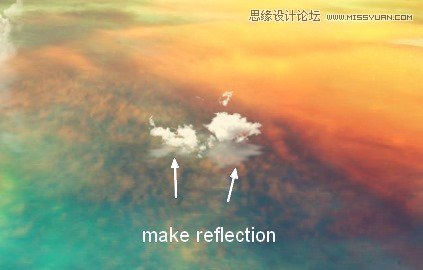
Make reflection for this cloud as done with the first:
Step 15
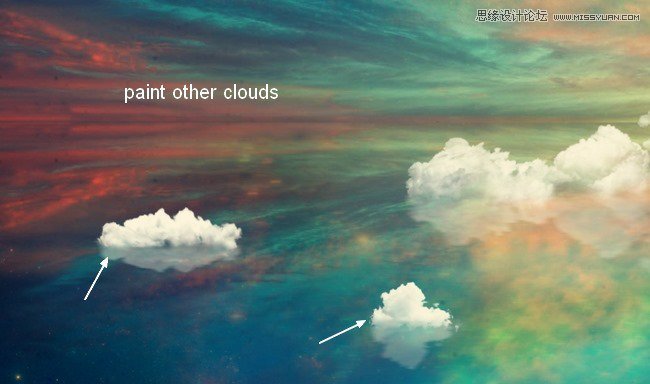
Paint two other clouds at the left of the first and make reflections for them:
 ���㲻Ҫ��
-
 Photoshop�������L�������ƬЧ����Ӣ��2018-04-23
-
 Photoshop�ϳ��L����(chu��ng)������L�i¹��Ӣ��2018-04-23
-
 Photoshop�ϳɱ�����Ч�Ľ��~������Ӣ��2018-02-10
-
 Photoshop�ϳɉ����L���ɭ�ֈ�����Ӣ��2018-02-10
-
 Photoshop�ϳ�����ʩ��������Ӣ��2018-02-10
-
 Photoshop���������|�е�3D���w�֡�Ӣ��2018-01-09
-
 Photoshop�OӋ����ȼ��ˇ�g�ֽ̡̳�Ӣ��2018-01-09
-
Photoshop�������L�������ƬЧ����Ӣ��
���P����11882018-04-23
-
Photoshop�ϳ��L����(chu��ng)������L�i¹��Ӣ��
���P����13832018-04-23
-
Photoshop�ϳɱ�����Ч�Ľ��~������Ӣ��
���P����34052018-02-10
-
 Photoshop�����S���|�����w�֡�Ӣ��
���P����7422018-02-10
Photoshop�����S���|�����w�֡�Ӣ��
���P����7422018-02-10
-
 Photoshop�����@�G����3D���w��
���P����14682018-02-10
Photoshop�����@�G����3D���w��
���P����14682018-02-10
-
Photoshop�ϳɉ����L���ɭ�ֈ�����Ӣ��
���P����24492018-02-10
-
Photoshop�ϳ�����ʩ��������Ӣ��
���P����8372018-02-10
-
 Photoshop�������p���ع����w
���P����6532018-01-09
Photoshop�������p���ع����w
���P����6532018-01-09
