Photoshop�ϳ�����ʩ��������Ӣ��(9)
����Դ�� photoshoptutorials.ws�����x���� MARIA SEMELEVICH �o�҂����������ʵ����£�Step 147
Now add magic mandala! I drew it myself :) If you do not like it, replace. Go to File> Place. Select imedge of mandala. Mandala layer must be the topmost.
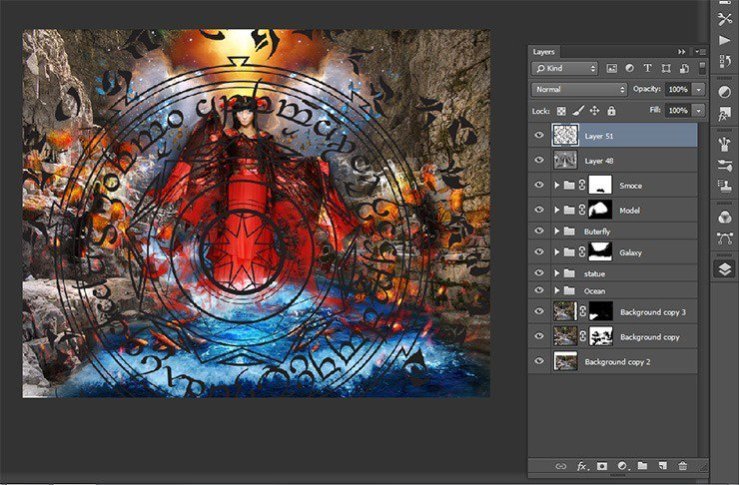
Step 148
Transform the mandala. Please change the size, to reduce the size of the circle on the water left, and then tilt it in the plane

Step 149
After transformations, invert it the short key Ctrl+ Shift+ I. Duplicate the layer with the mandala the short key Ctrl+ J.
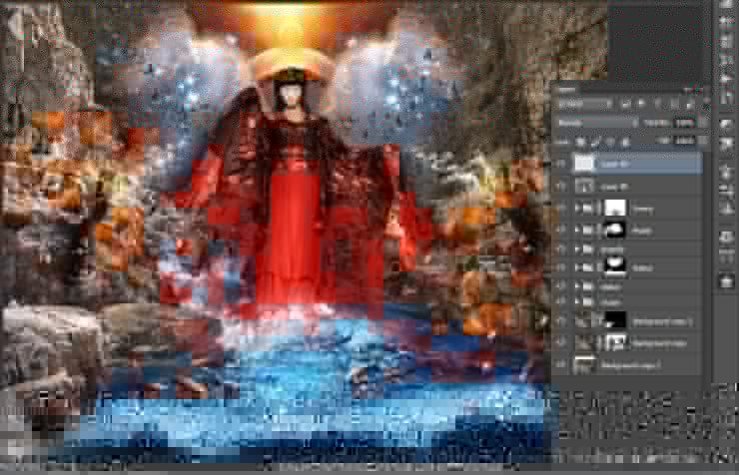
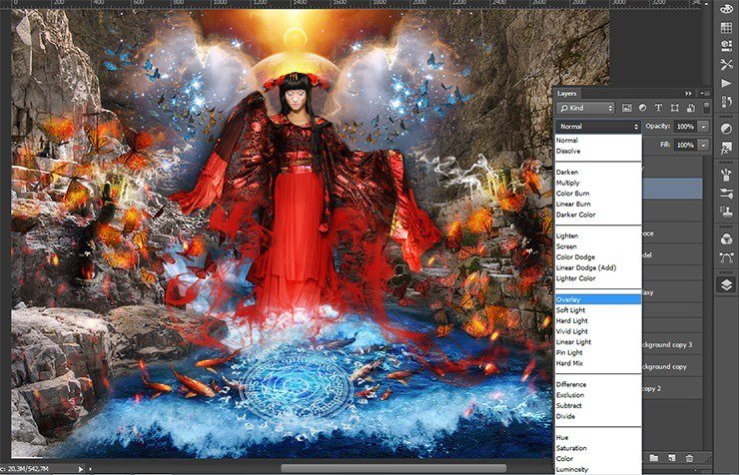
Step 150
Change the blending mode for the first mandala to Overlay for a second Lighter Color.

Step 151
Proceed to completion of the atmosphere. Create a new layer the short key Ctrl+ Shift+ N and fill it with black. Add a layer mask.
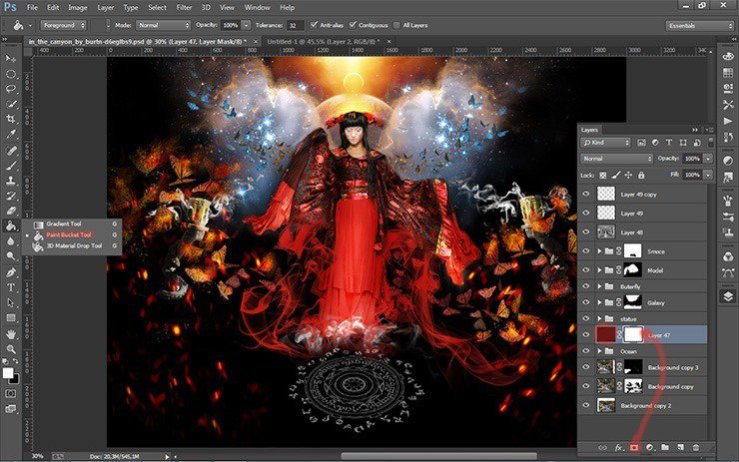
Step 152
Take Brush Tool (B). Set these settings: Size: 400px, Hardness: 0% Opacity: 60%, Flow: 100%. Remove from the middle part and of the landscape black.
Step 153
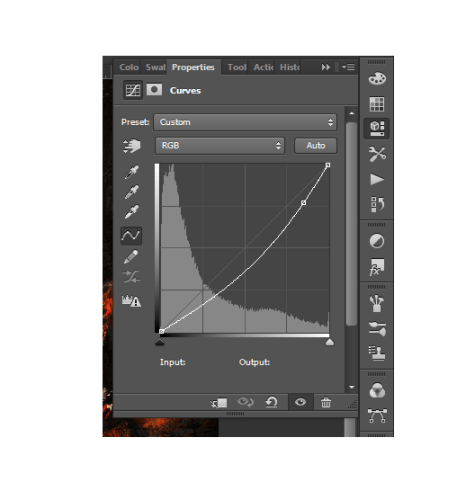
Proceed to the final part. Add two adjustment layers. The first is Curves.

I wanted bright colors were much brighter, so set the curve as shown in the figure.
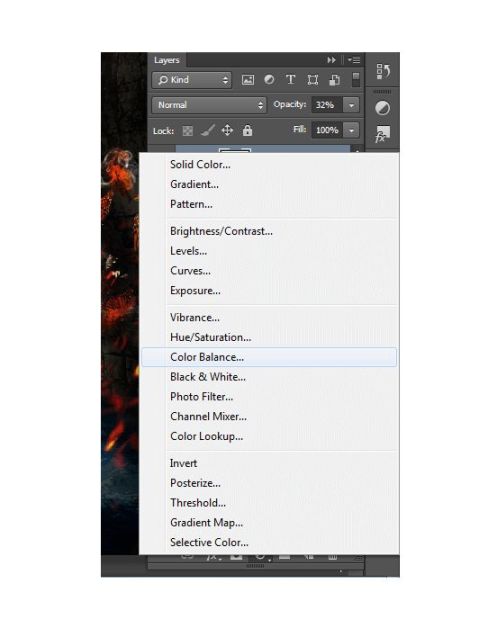
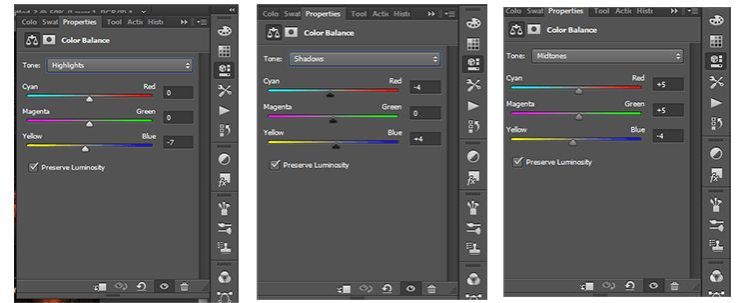
Step 154
The second adjustment layer is Color Balance.
Step 155
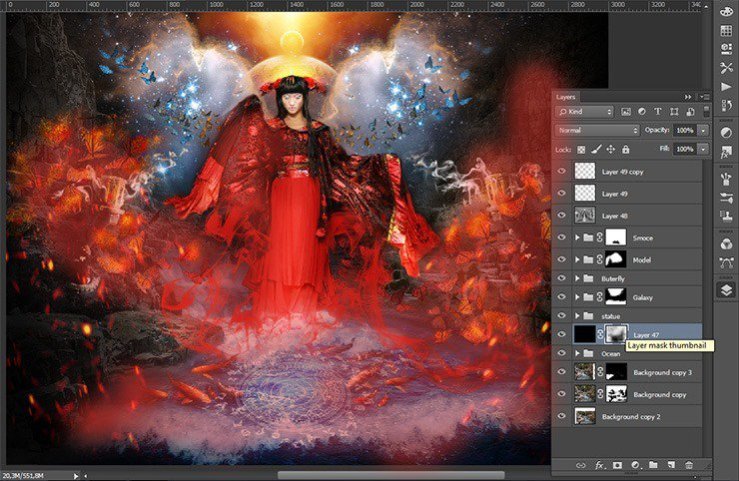
Here is the complete look of the final. Painting has done! You1 can see all the layers and their location.
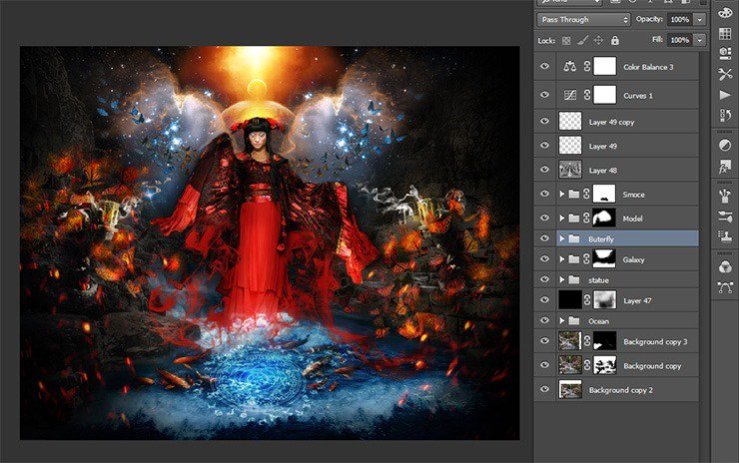
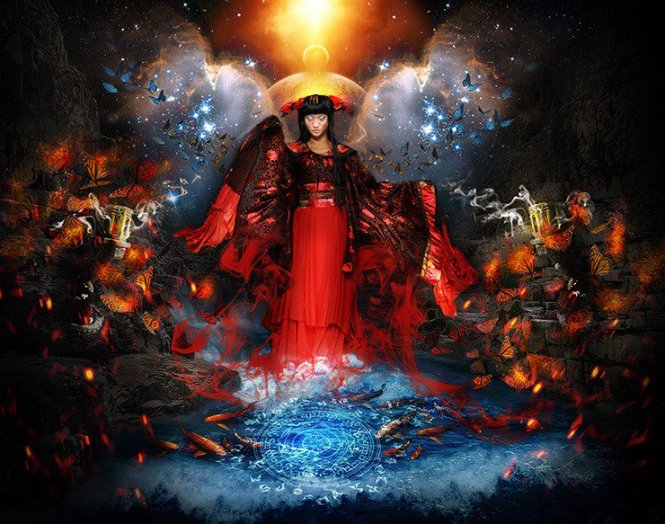
Final Results
 ��ǵ���
-
 Photoshop�������L�������ƬЧ����Ӣ��2018-04-23
-
 Photoshop�ϳ��L����������L�i¹��Ӣ��2018-04-23
-
 Photoshop�ϳɱ�����Ч�Ľ��~������Ӣ��2018-02-10
-
 Photoshop�ϳɉ����L���ɭ�ֈ�����Ӣ��2018-02-10
-
 Photoshop�ϳ�����ʩ��������Ӣ��2018-02-10
-
 Photoshop���������|�е�3D���w�֡�Ӣ��2018-01-09
-
 Photoshop�OӋ����ȼ��ˇ�g�ֽ̡̳�Ӣ��2018-01-09
-
Photoshop�������L�������ƬЧ����Ӣ��
���P����11882018-04-23
-
Photoshop�ϳ��L����������L�i¹��Ӣ��
���P����13832018-04-23
-
Photoshop�ϳɱ�����Ч�Ľ��~������Ӣ��
���P����34052018-02-10
-
 Photoshop�����S���|�����w�֡�Ӣ��
���P����7422018-02-10
Photoshop�����S���|�����w�֡�Ӣ��
���P����7422018-02-10
-
 Photoshop�����@�G����3D���w��
���P����14682018-02-10
Photoshop�����@�G����3D���w��
���P����14682018-02-10
-
Photoshop�ϳɉ����L���ɭ�ֈ�����Ӣ��
���P����24492018-02-10
-
 Photoshop�������p���ع����w
���P����6532018-01-09
Photoshop�������p���ع����w
���P����6532018-01-09
-
 Photoshop����ľ�ذ�LOGO��ӡЧ����Ӣ��
���P����19272018-01-09
Photoshop����ľ�ذ�LOGO��ӡЧ����Ӣ��
���P����19272018-01-09
