Photoshop����ľ�ذ�LOGO��ӡЧ����Ӣ��(5)
����Դ�� Tutsplus�����x���� Tom Piccarreda �o�҂����������ʵ����£�Step 11
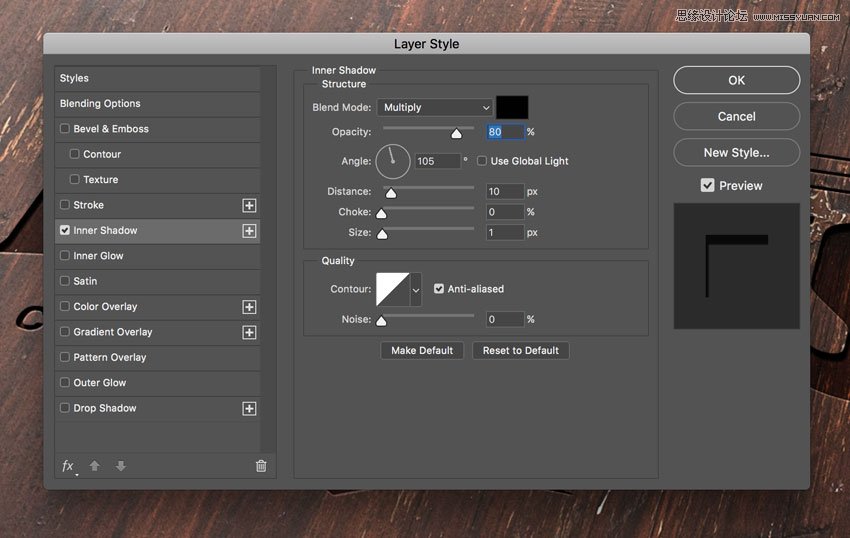
Let's add a layer style to the "Effect 2" layer.
Open the Layer Style panel and add a new Inner Shadow effect, set the Blend Mode color to #000000, and set the rest as follows:
Step 12
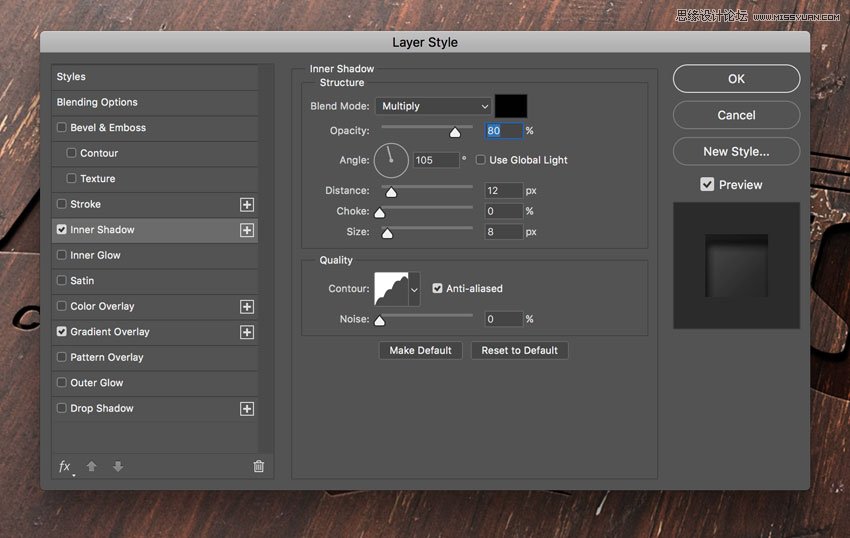
Let's add a layer style to the "Effect 1" layer.
Open the Layer Style panel and add a new Inner Shadow effect, set the Blend Mode color to #000000, and set the rest as follows:
Advertisement
Step 13
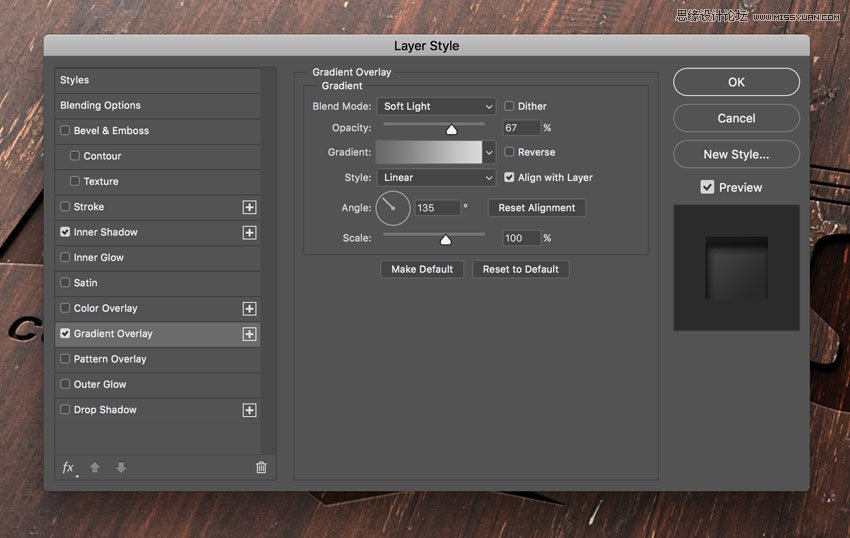
Add a new Gradient Overlay effect and set the options as follows:
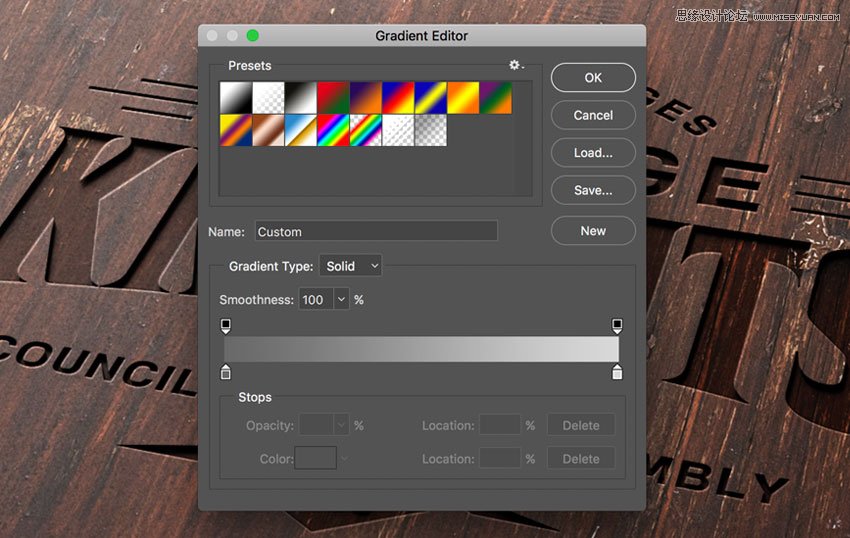
Click on the small gradient window to edit the gradient color.
Set the first color stop to Color #696969 and Location 0%.
Set the second color stop to Color #d9d9d9 and Location 100%.
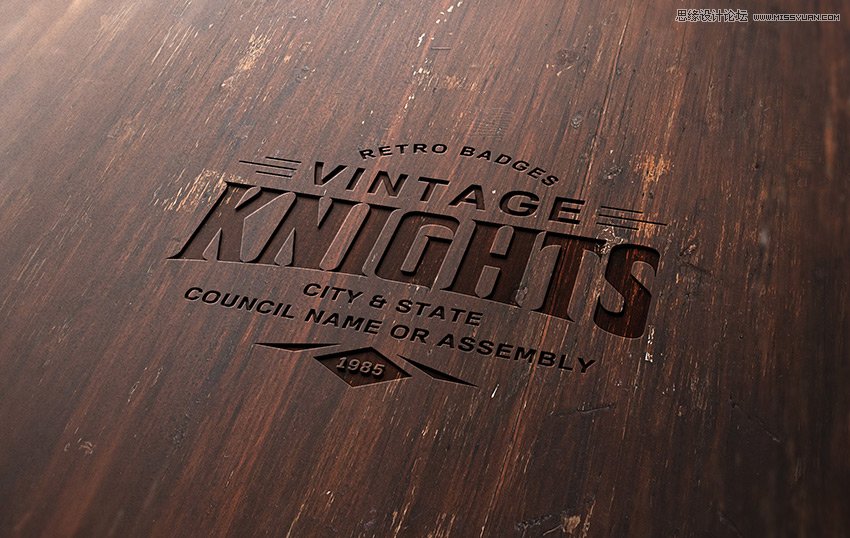
Congratulations, You're Done!
In this tutorial we learned how to create an engraved wood logo mockup with Adobe Photoshop!
I hope that you've enjoyed my tutorial and learned something new. Please feel free to leave your comments, suggestions, and outcomes below.
Enjoy Photoshopping!
 ���㲻Ҫ��
-
 Photoshop�������L�������ƬЧ����Ӣ��2018-04-23
-
 Photoshop�ϳ��L����������L�i¹��Ӣ��2018-04-23
-
 Photoshop�ϳɱ�����Ч�Ľ��~������Ӣ��2018-02-10
-
 Photoshop�ϳɉ����L���ɭ�ֈ�����Ӣ��2018-02-10
-
 Photoshop�ϳ�����ʩ��������Ӣ��2018-02-10
-
 Photoshop���������|�е�3D���w�֡�Ӣ��2018-01-09
-
 Photoshop�OӋ����ȼ��ˇ�g�ֽ̡̳�Ӣ��2018-01-09
-
Photoshop�������L�������ƬЧ����Ӣ��
���P����11882018-04-23
-
Photoshop�ϳ��L����������L�i¹��Ӣ��
���P����13832018-04-23
-
Photoshop�ϳɱ�����Ч�Ľ��~������Ӣ��
���P����34052018-02-10
-
 Photoshop�����S���|�����w�֡�Ӣ��
���P����7422018-02-10
Photoshop�����S���|�����w�֡�Ӣ��
���P����7422018-02-10
-
 Photoshop�����@�G����3D���w��
���P����14682018-02-10
Photoshop�����@�G����3D���w��
���P����14682018-02-10
-
Photoshop�ϳɉ����L���ɭ�ֈ�����Ӣ��
���P����24492018-02-10
-
Photoshop�ϳ�����ʩ��������Ӣ��
���P����8372018-02-10
-
 Photoshop�������p���ع����w
���P����6532018-01-09
Photoshop�������p���ع����w
���P����6532018-01-09
