Photoshop����ë����ʥ�Q�����w��Ӣ��(10)
����Դ�� Tutsplus.com�����x���� Rose �o�҂����������ʵ����£�12. How to Modify a Background Image
Step 1
Double-click the Background Image Smart Object's thumbnail to open its file.
Pick the Content-Aware Move Tool, and set the Mode to Move in the Options bar.
Select the object you want to move and place somewhere else, and make sure to include some empty space around it within the selection.
You can check the Transform on Drop box if you want to transform the object after moving it.

Step 2
Move the selected object to its new position, transform it if needed, and then hit Return.

Step 3
After that, you can use any of the other Healing Tools to better blend the object's edges with the new background.
You can also use the Dodge, Burn, and Sponge Tools wherever needed.

Step 4
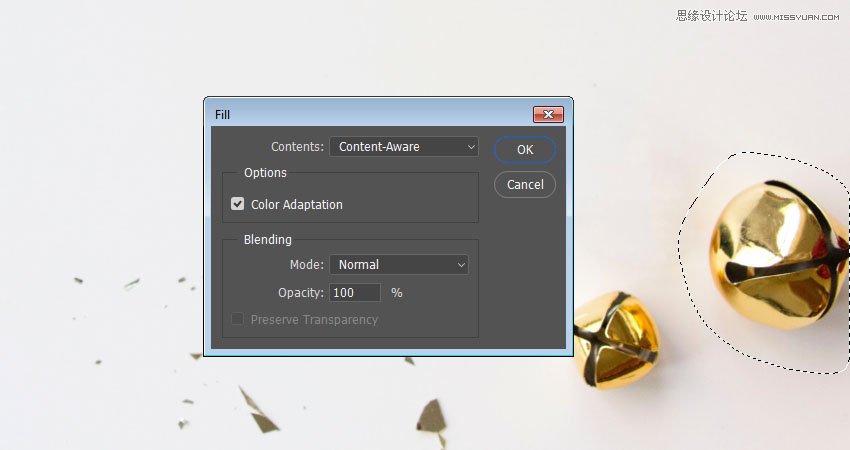
If there are any parts you want to remove completely, select them using any selection tool, and go to Edit > Fill and choose Content-Aware from the Content menu.
Step 5
Again, use the Healing Tools to make any further adjustment to the area after removing the object.

Step 6
Make any other adjustment needed to the background using the same tools.

Step 7
You can save the file and go back to the original document to see the changes there and make any necessary adjustments.

 ���㲻Ҫ��
-
 Photoshop�������L�������ƬЧ����Ӣ��2018-04-23
-
 Photoshop�ϳ��L����������L�i¹��Ӣ��2018-04-23
-
 Photoshop�ϳɱ�����Ч�Ľ��~������Ӣ��2018-02-10
-
 Photoshop�ϳɉ����L���ɭ�ֈ�����Ӣ��2018-02-10
-
 Photoshop�ϳ�����ʩ��������Ӣ��2018-02-10
-
 Photoshop���������|�е�3D���w�֡�Ӣ��2018-01-09
-
 Photoshop�OӋ����ȼ��ˇ�g�ֽ̡̳�Ӣ��2018-01-09
-
Photoshop�������L�������ƬЧ����Ӣ��
���P����11882018-04-23
-
 Photoshop�����S���|�����w�֡�Ӣ��
���P����7422018-02-10
Photoshop�����S���|�����w�֡�Ӣ��
���P����7422018-02-10
-
 Photoshop�����@�G����3D���w��
���P����14682018-02-10
Photoshop�����@�G����3D���w��
���P����14682018-02-10
-
 Photoshop�������p���ع����w
���P����6532018-01-09
Photoshop�������p���ع����w
���P����6532018-01-09
-
 Photoshop����ľ�ذ�LOGO��ӡЧ����Ӣ��
���P����19272018-01-09
Photoshop����ľ�ذ�LOGO��ӡЧ����Ӣ��
���P����19272018-01-09
-
Photoshop���������|�е�3D���w�֡�Ӣ��
���P����4612018-01-09
-
Photoshop�OӋ����ȼ��ˇ�g�ֽ̡̳�Ӣ��
���P����7612018-01-09
-
 Photoshop�����Ż���M�ɵ�ˇ�g�֡�Ӣ��
���P����3802018-01-09
Photoshop�����Ż���M�ɵ�ˇ�g�֡�Ӣ��
���P����3802018-01-09
