Photoshop�ϳɱ�������ס��Ů����Ӣ��(6)
����Դ�� photoshoptutorials�����x���� ANTAKA NGUYEN �o�҂����������ʵ����£�Step 24
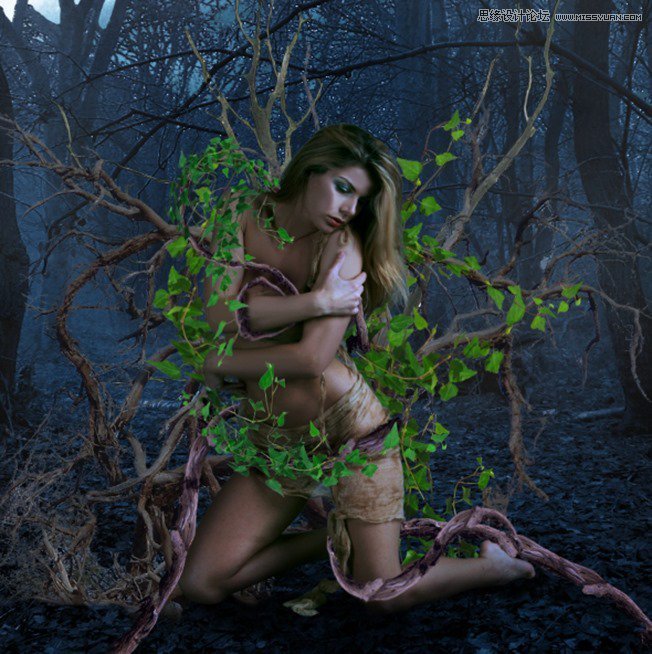
With the appearance of the branches and ivies, we will need to some extra shadow to the ground since the current shadow is a little weak.
The method is similar to the way we create shadow in the previous step. Change the Blend Mode to Soft Light.
Step 25
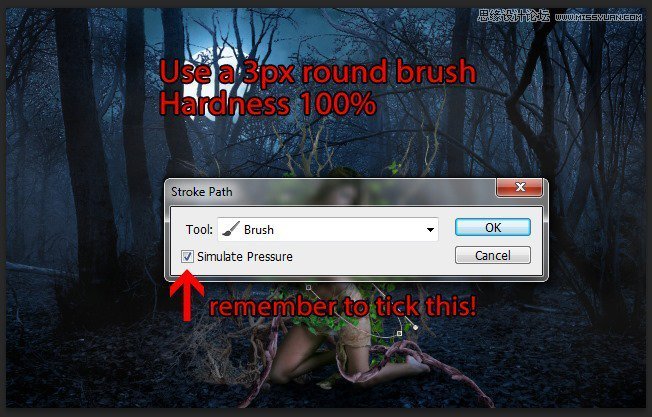
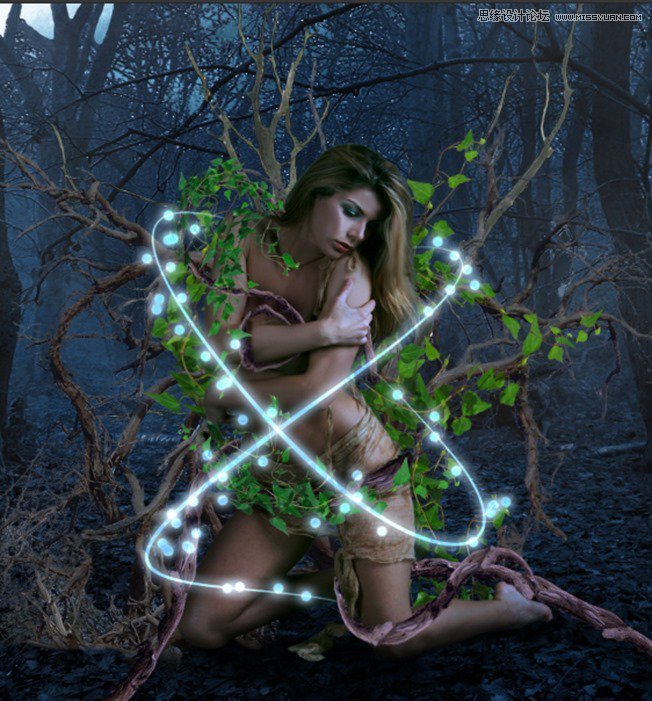
Now we will create a simple yet special effect for the model so the piece looks more…magical. Create a new layer , grab the Pen Tool and draw a curve line around her body like this :

Before continue please go to the Brush Tool, choose a 5px round brush with 100% Hardness.
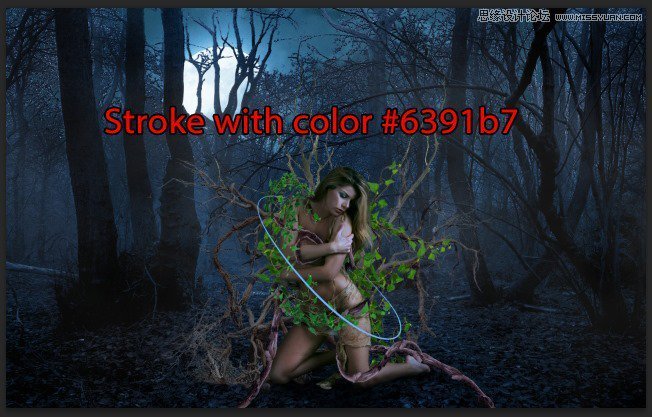
Back to the Pen Tool, right click on the curve line you just drew and chooseStroke Path. Choose Brush as Tool, tick on the Simulate Pressure.
The Stroke Path option will use your Foreground color as the stroke color so set the Foreground color as #6391b7 then click OK. Here’s what we will have :
Step 26
Apply these setting for the Curve Line layer’s Blending Option :
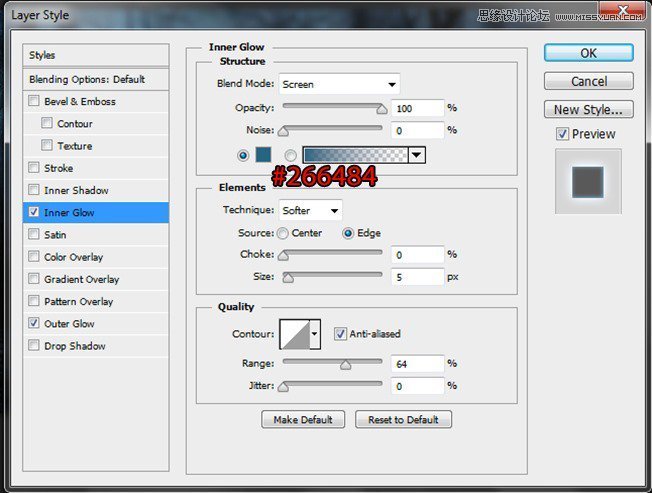
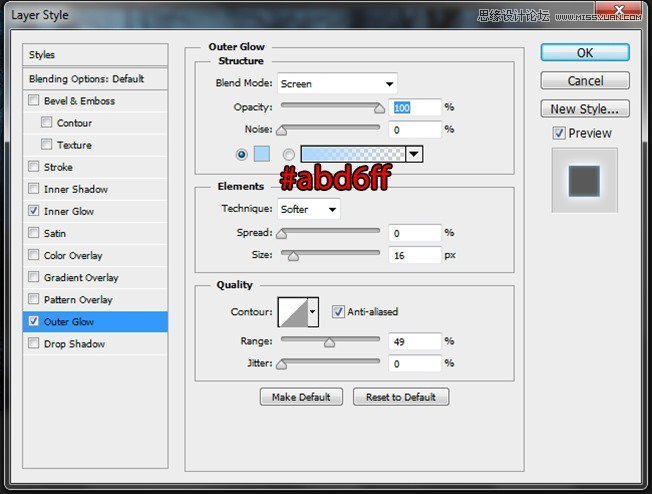
Change the Blend Mode to Linear Dodge and we will have a nice glowing line!
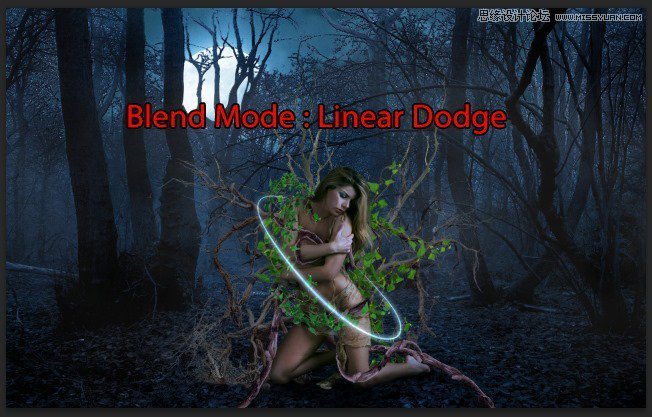
Do the same with another line.
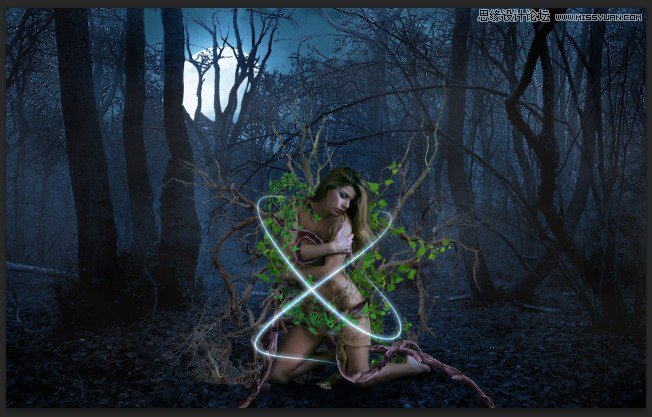
Step 27
Create another new layer, use 7px round brush, 100% Hardness.
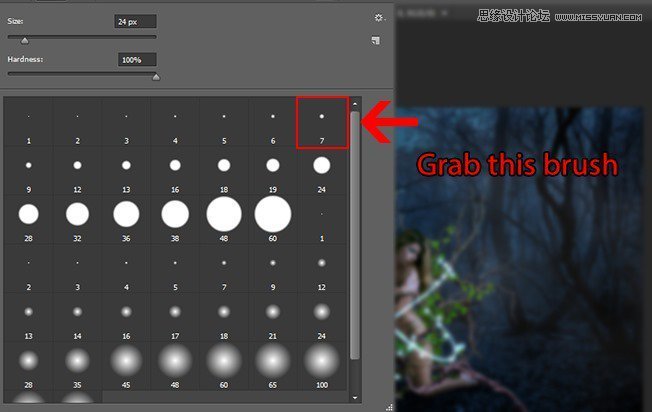
Open the Brush Panel (shortcut : F5) and adjust the setting like this :
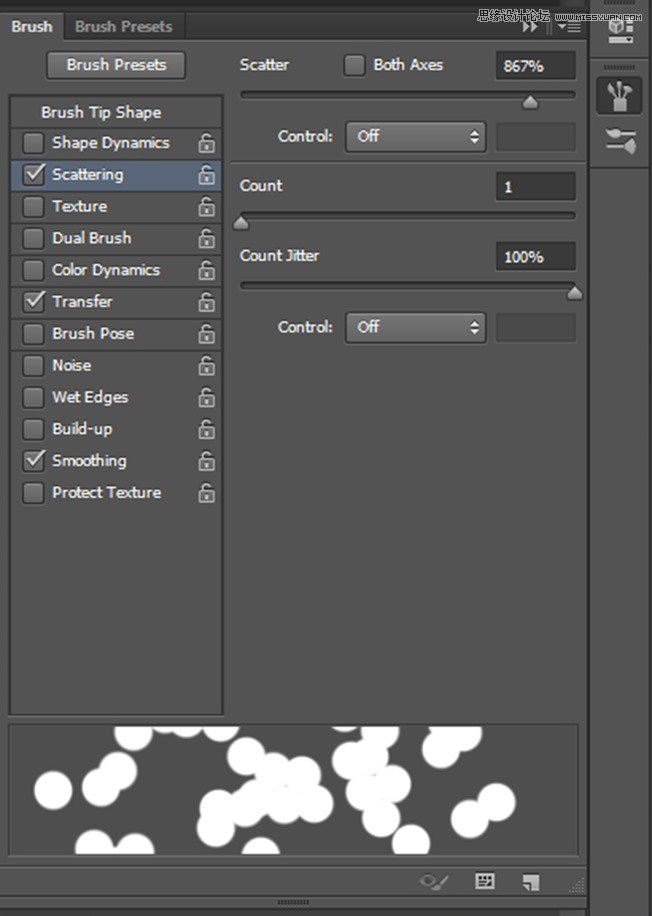
Now paint around the model, with the setting we just had, the round will be scattered as we paint, create a bokeh-like effect. Apply the same Blending Option and color like we did with the Curve Lines.
 ���㲻Ҫ��
-
 Photoshop�������L�������ƬЧ����Ӣ��2018-04-23
-
 Photoshop�ϳ��L����������L�i¹��Ӣ��2018-04-23
-
 Photoshop�ϳɱ�����Ч�Ľ��~������Ӣ��2018-02-10
-
 Photoshop�ϳɉ����L���ɭ�ֈ�����Ӣ��2018-02-10
-
 Photoshop�ϳ�����ʩ��������Ӣ��2018-02-10
-
 Photoshop���������|�е�3D���w�֡�Ӣ��2018-01-09
-
 Photoshop�OӋ����ȼ��ˇ�g�ֽ̡̳�Ӣ��2018-01-09
-
Photoshop�������L�������ƬЧ����Ӣ��
���P����11882018-04-23
-
Photoshop�ϳ��L����������L�i¹��Ӣ��
���P����13832018-04-23
-
Photoshop�ϳɱ�����Ч�Ľ��~������Ӣ��
���P����34052018-02-10
-
 Photoshop�����S���|�����w�֡�Ӣ��
���P����7422018-02-10
Photoshop�����S���|�����w�֡�Ӣ��
���P����7422018-02-10
-
 Photoshop�����@�G����3D���w��
���P����14682018-02-10
Photoshop�����@�G����3D���w��
���P����14682018-02-10
-
Photoshop�ϳɉ����L���ɭ�ֈ�����Ӣ��
���P����24492018-02-10
-
Photoshop�ϳ�����ʩ��������Ӣ��
���P����8372018-02-10
-
 Photoshop�������p���ع����w
���P����6532018-01-09
Photoshop�������p���ع����w
���P����6532018-01-09
