Photoshop�ϳɱ�������ס��Ů����Ӣ��(2)
����Դ�� photoshoptutorials�����x���� ANTAKA NGUYEN �o�҂����������ʵ����£�Step 6 – Adding Base Fog
Download the Fog Brush in the Resources list, open it and grab any fog brush you want and start painting.

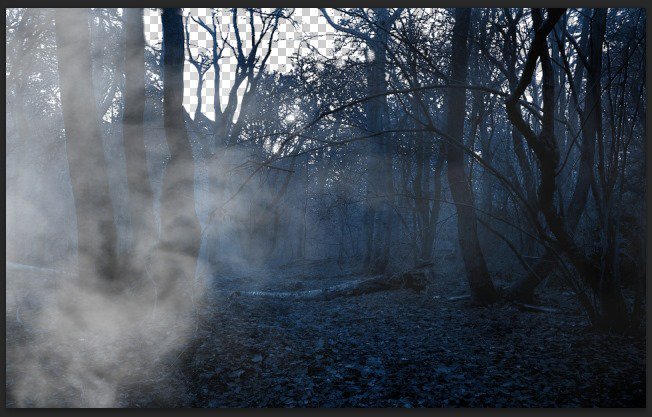
Layer Mask on these fog layers as we only want some subtle fog effect to spice up the atmosphere of the image.
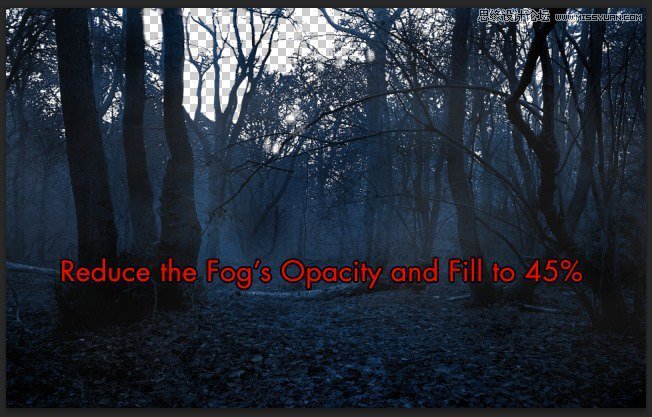
Reduce the fog layer Opacity and Fill to 45%. The number can be changed as you desire, depends on how strong you want the fog to be.
Step 7 – Extracting The Model
Open the Model stock photo and start extracting her, you can use Quick Selection Tool to do so as the photo’s quality is high and the contrast is enough for Quick Selection Tool to do its work. Otherwise you can use Pen Toolfor a better result but more time-consuming, its up to you!
Place the model into our document after you’ve done the extracting.
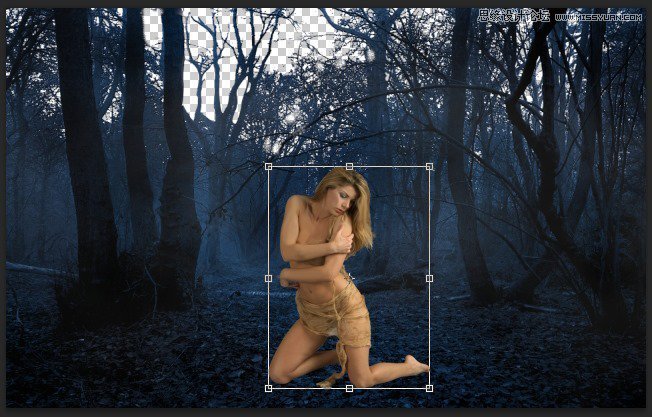
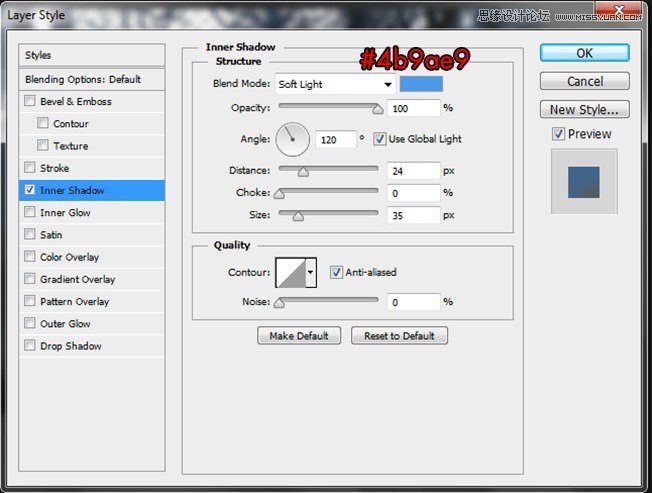
Step 8 – First Model Blending Process
Access to the Model’s Blending Option -> Inner Shadow and adjust the attribute like this :
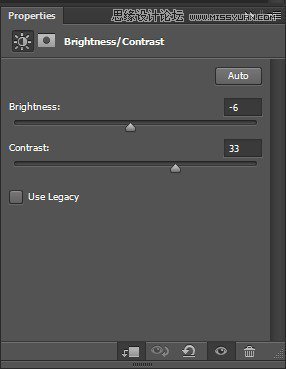
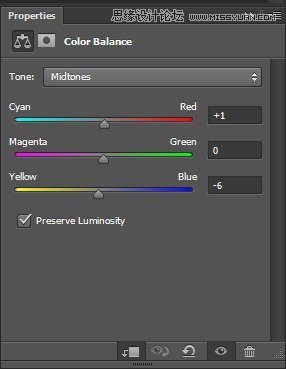
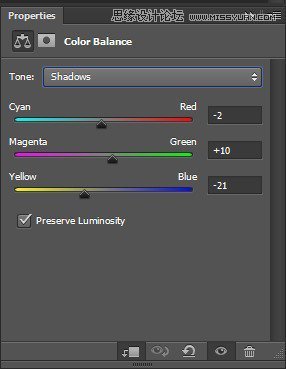
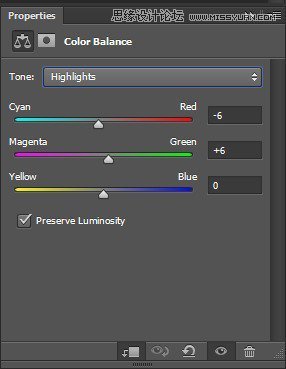
Continue adding these following adjustment layers :
Curves -> Brightness/Contrast -> Photo Filter -> Color Balance -> Exposure


And here is the result :

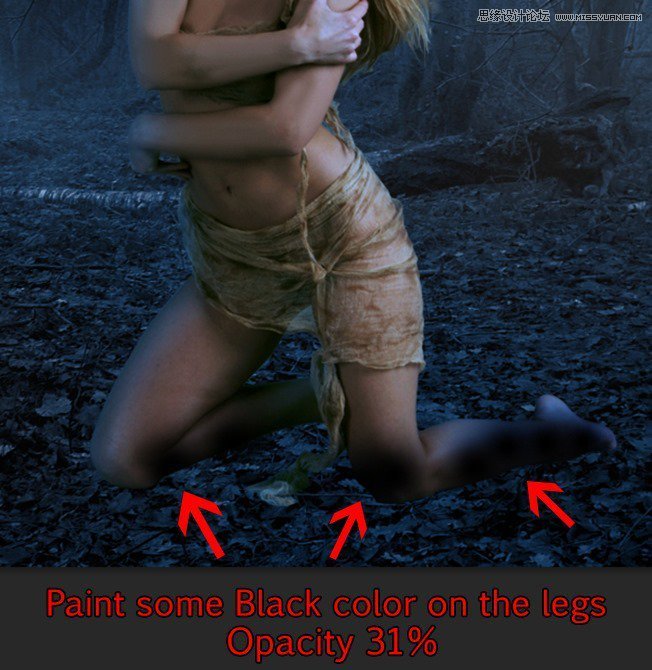
Step 9 – Adding Shadow To The Model’s Legs
We will use the same method we just did with the forest to the model’s legs in this step. Reduce the Opacity to 31%.
 ���㲻Ҫ��
-
 Photoshop�������L�������ƬЧ����Ӣ��2018-04-23
-
 Photoshop�ϳ��L����������L�i¹��Ӣ��2018-04-23
-
 Photoshop�ϳɱ�����Ч�Ľ��~������Ӣ��2018-02-10
-
 Photoshop�ϳɉ����L���ɭ�ֈ�����Ӣ��2018-02-10
-
 Photoshop�ϳ�����ʩ��������Ӣ��2018-02-10
-
 Photoshop���������|�е�3D���w�֡�Ӣ��2018-01-09
-
 Photoshop�OӋ����ȼ��ˇ�g�ֽ̡̳�Ӣ��2018-01-09
-
Photoshop�������L�������ƬЧ����Ӣ��
���P����11882018-04-23
-
Photoshop�ϳ��L����������L�i¹��Ӣ��
���P����13832018-04-23
-
Photoshop�ϳɱ�����Ч�Ľ��~������Ӣ��
���P����34052018-02-10
-
 Photoshop�����S���|�����w�֡�Ӣ��
���P����7422018-02-10
Photoshop�����S���|�����w�֡�Ӣ��
���P����7422018-02-10
-
 Photoshop�����@�G����3D���w��
���P����14682018-02-10
Photoshop�����@�G����3D���w��
���P����14682018-02-10
-
Photoshop�ϳɉ����L���ɭ�ֈ�����Ӣ��
���P����24492018-02-10
-
Photoshop�ϳ�����ʩ��������Ӣ��
���P����8372018-02-10
-
 Photoshop�������p���ع����w
���P����6532018-01-09
Photoshop�������p���ع����w
���P����6532018-01-09
