Photoshop�������L�������ƬЧ����Ӣ��(2)
����Դ�� վ�������x���� Melody Nieves �o�҂����������ʵ����£�Step 6
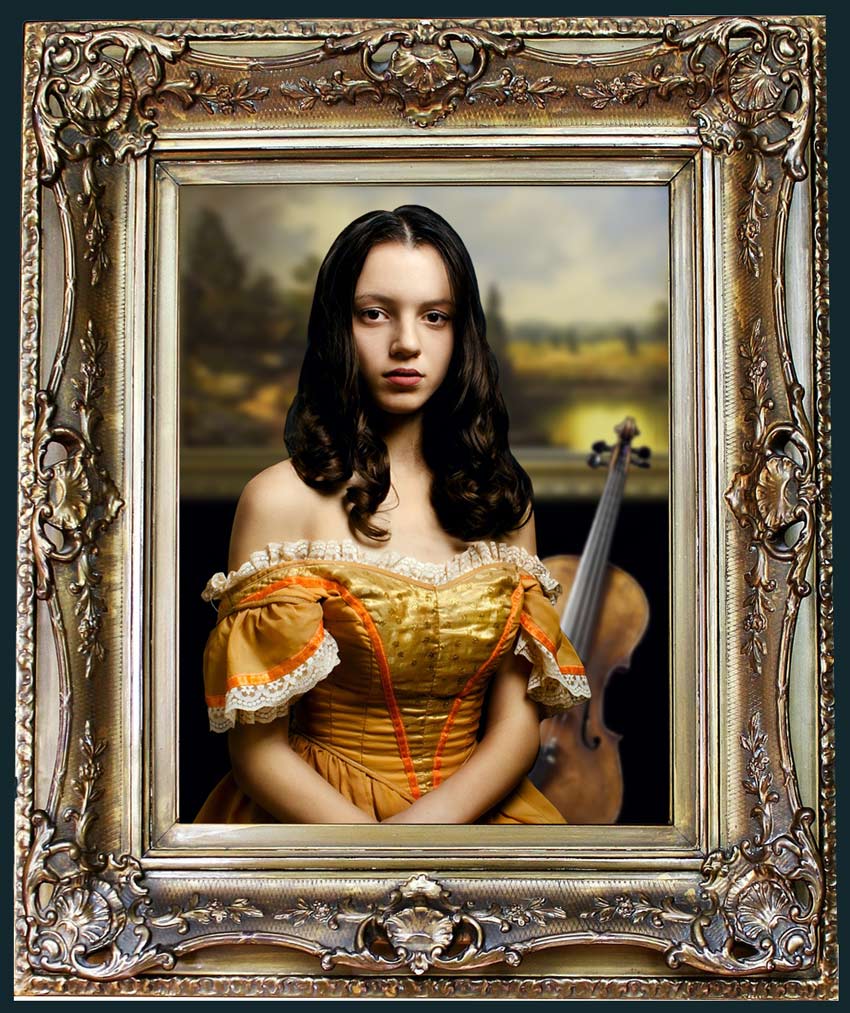
Now open the Painting image in a separate document.
Unhide the Visibility of the picture frame and model layers.
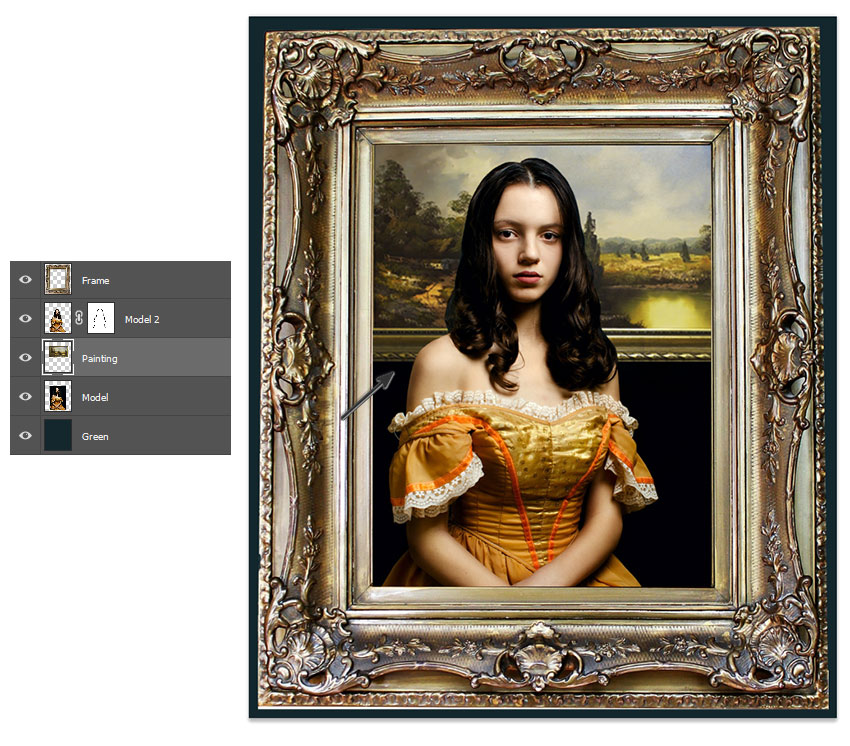
Use the Rectangular Marquee Tool (M) to select the painting image. Then Copy and Paste it onto a New Layer beneath the Model 2 layer.
Use the Free Transform Tool (Control-T) to resize the painting and place it behind her as shown above. She should now appear in front of it to help build the scene.
Step 7
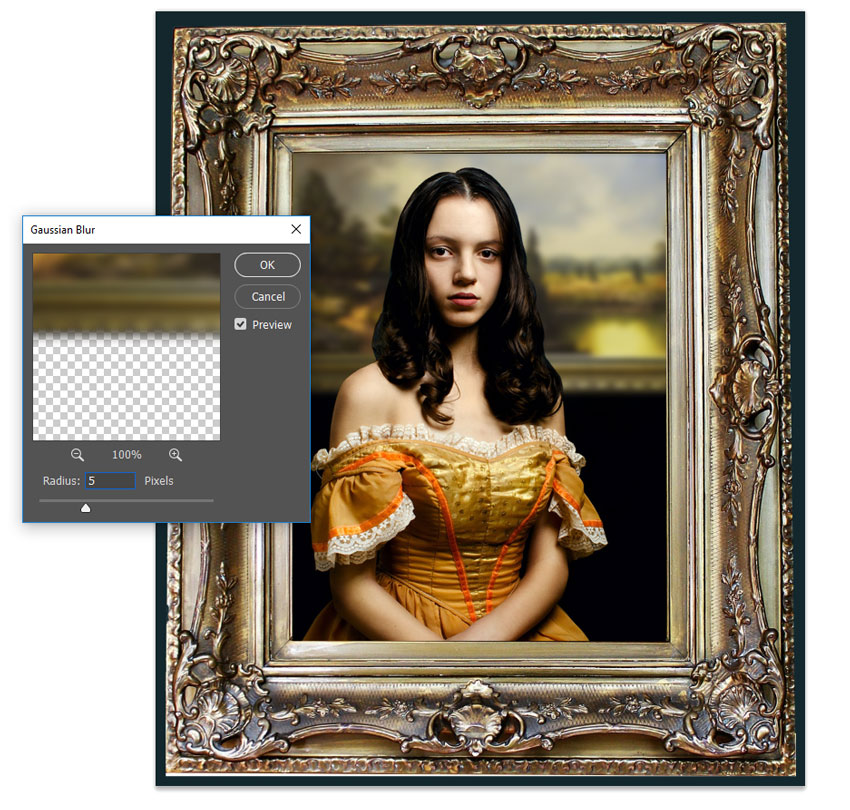
For more depth, let's blur the painting.
Select the painting layer and go to Filter > Blur > Gaussian Blur.
Add a Radius of 5 pixels and hit OK.
Step 8
Looking great so far!
Now let's add the violin.
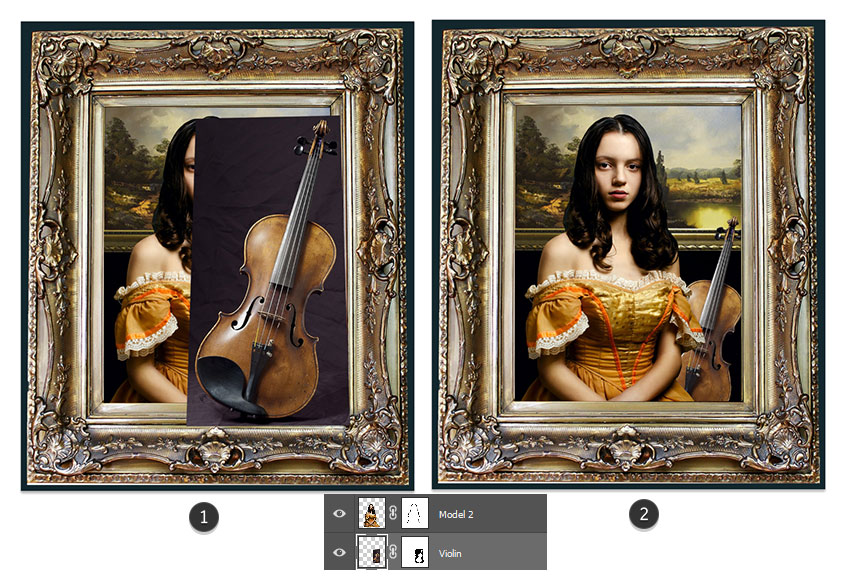
Create a rough extraction of the violin with the Polygonal Lasso Tool (L). Copy and Paste it onto a New Layer.
Position this layer beneath the model 2 layer but above the painting layer. Add a Layer Mask to the violin and follow the same step as before to mask out the background using a Hard Round Brush (100% Hardness/100% Opacity).
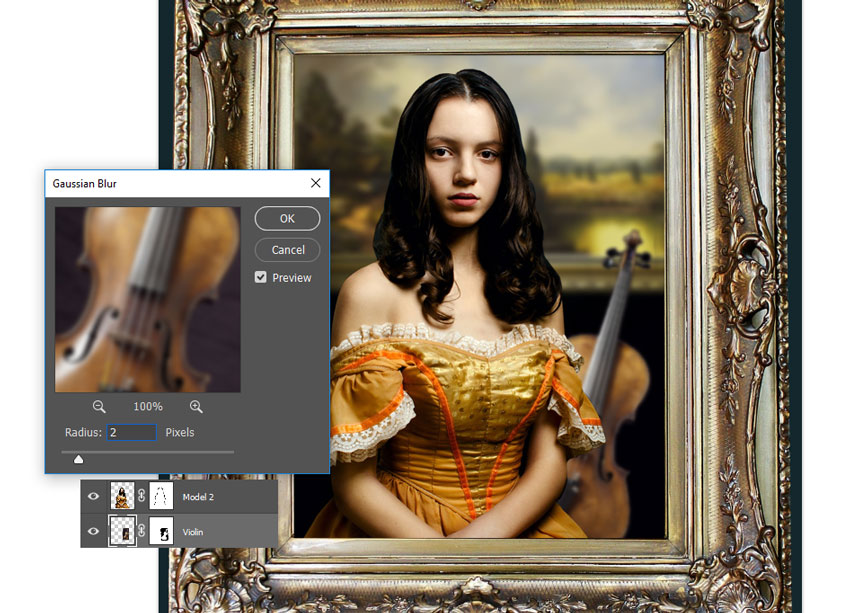
Let's blur the violin.
With the violin layer selected, go to Filter > Blur > Gaussian Blur.
Add a Radius of 2 pixels and hit OK.
2. How to Add Shadow and Vintage Coloring
The next part of this tutorial will focus on aging the photo and creating dramatic lighting. Then we'll finish by adding more shadow and texture to the entire scene.
Here is what we have so far for this composition.
Let's take a look!
 ��ǵ���
-
 Photoshop�������L�������ƬЧ����Ӣ��2018-04-23
-
 Photoshop�ϳ��L����������L�i¹��Ӣ��2018-04-23
-
 Photoshop�ϳɱ�����Ч�Ľ��~������Ӣ��2018-02-10
-
 Photoshop�ϳɉ����L���ɭ�ֈ�����Ӣ��2018-02-10
-
 Photoshop�ϳ�����ʩ��������Ӣ��2018-02-10
-
 Photoshop���������|�е�3D���w�֡�Ӣ��2018-01-09
-
 Photoshop�OӋ����ȼ��ˇ�g�ֽ̡̳�Ӣ��2018-01-09
-
 Photoshop�����S���|�����w�֡�Ӣ��
���P����7422018-02-10
Photoshop�����S���|�����w�֡�Ӣ��
���P����7422018-02-10
-
 Photoshop�����@�G����3D���w��
���P����14682018-02-10
Photoshop�����@�G����3D���w��
���P����14682018-02-10
-
Photoshop�ϳɉ����L���ɭ�ֈ�����Ӣ��
���P����24492018-02-10
-
 Photoshop�������p���ع����w
���P����6532018-01-09
Photoshop�������p���ع����w
���P����6532018-01-09
-
 Photoshop����ľ�ذ�LOGO��ӡЧ����Ӣ��
���P����19272018-01-09
Photoshop����ľ�ذ�LOGO��ӡЧ����Ӣ��
���P����19272018-01-09
-
Photoshop���������|�е�3D���w�֡�Ӣ��
���P����4612018-01-09
-
 Photoshop�����Ż���M�ɵ�ˇ�g�֡�Ӣ��
���P����3802018-01-09
Photoshop�����Ż���M�ɵ�ˇ�g�֡�Ӣ��
���P����3802018-01-09
-
 Photoshop�����ɐ۵��ǹ���֡�Ӣ��
���P����6722017-12-25
Photoshop�����ɐ۵��ǹ���֡�Ӣ��
���P����6722017-12-25
