Photoshop�OӋ����ȼ��ˇ�g�ֽ̡̳�Ӣ��(3)
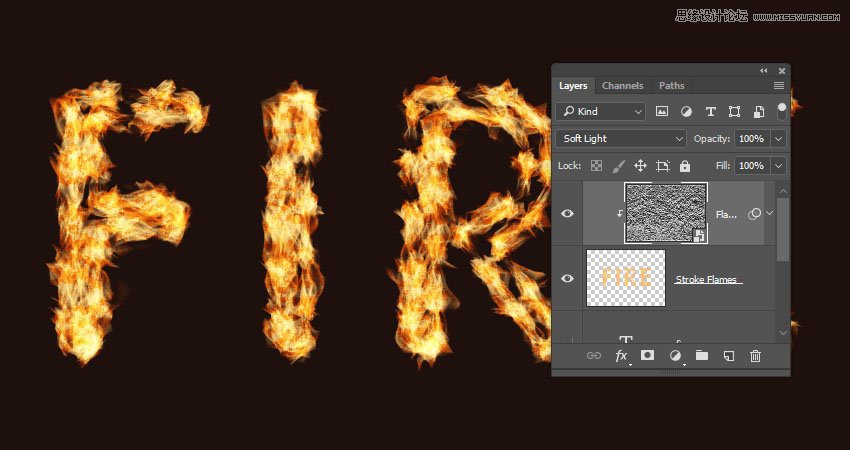
����Դ�� Tutsplus�����x���� Rose �o�҂����������ʵ����£�6. How to Adjust a Layer's Blending Options
Step 1
Change the Flame Texture layer's Blend Mode to Soft Light.
Step 2
Double-click the Flame Texture layer to adjust its Blending Options. We are going to adjust the This Layersliders under the Blend If section.
Press-hold the Option key, and click-drag the right slider to split it. As you move the slider's ends, you'll notice how the texture starts to blend better with the flames.
What this slider does is prevent the lighter areas of the texture from interacting with the content below it.
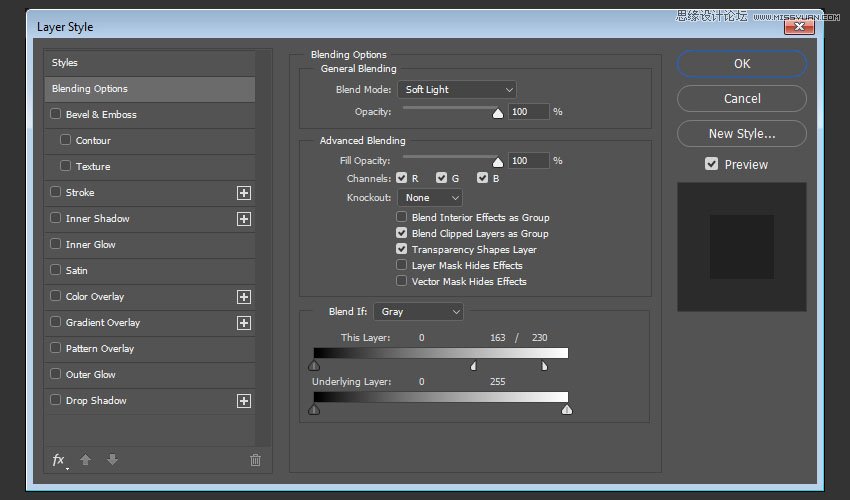
Step 3
Try different values until you like the outcome.
We will get back to the texture at the end of the tutorial to blur it, so you can also modify the values some more then.

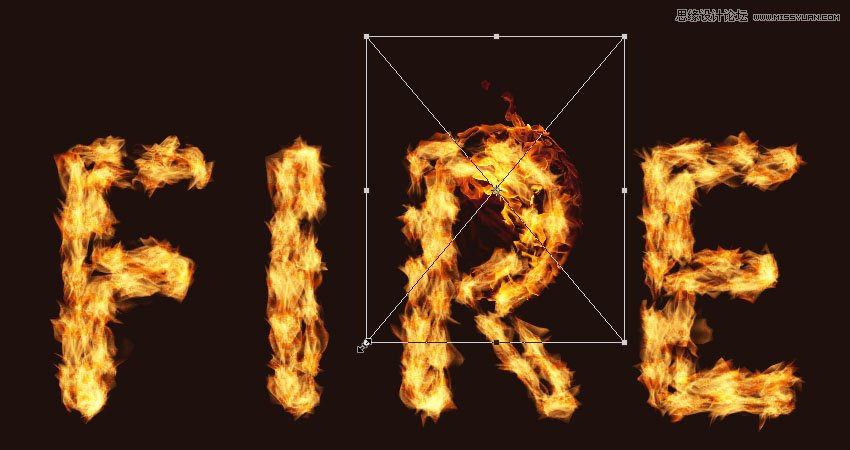
7. How to Add Flame Images
Step 1
Use any of the flame images from the Flames0032, Flames0036, and Flames0043 sets to add to the text.
It is better to add the images as Smart Objects so that you can apply changes to them non-destructively.
To do so, go to File > Place Linked, and open the image you want to add.
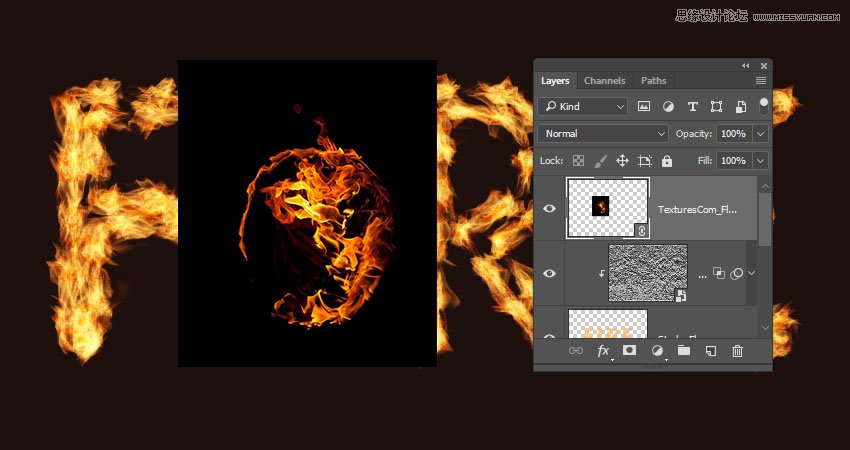
Step 2
Change the image layer's Blend Mode to Screen.
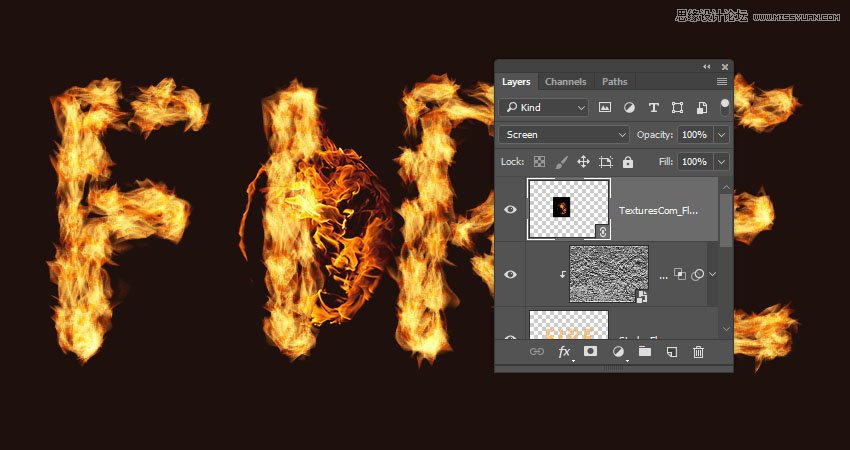
Step 3
Press Command-T to enter the Free Transform Mode, and move, resize, and rotate the image to place it over a part of the text.
Hit the Return key to commit the changes.
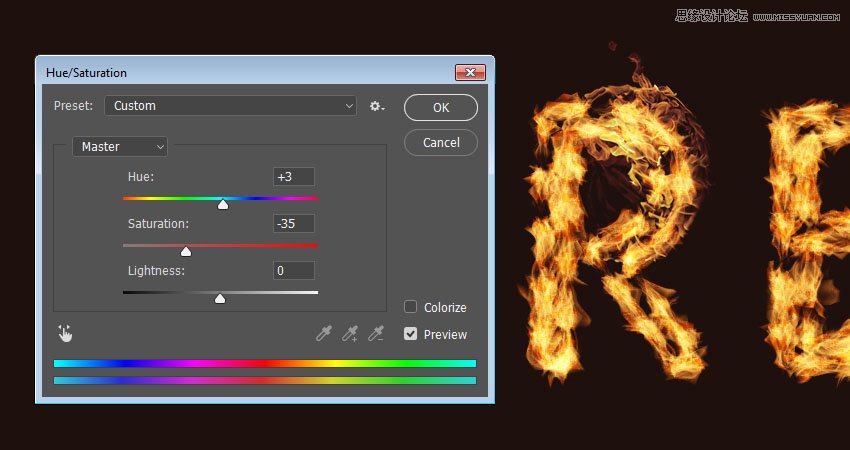
Step 4
Go to Image > Adjustments > Hue/Saturation, and change the Hue to 3 and the Saturation to -35, or use any other values to match the color of the image's flame with the stroke's flame color.
 ���㲻Ҫ��
-
 Photoshop�������L�������ƬЧ����Ӣ��2018-04-23
-
 Photoshop�ϳ��L����������L�i¹��Ӣ��2018-04-23
-
 Photoshop�ϳɱ�����Ч�Ľ��~������Ӣ��2018-02-10
-
 Photoshop�ϳɉ����L���ɭ�ֈ�����Ӣ��2018-02-10
-
 Photoshop�ϳ�����ʩ��������Ӣ��2018-02-10
-
 Photoshop���������|�е�3D���w�֡�Ӣ��2018-01-09
-
 Photoshop�OӋ����ȼ��ˇ�g�ֽ̡̳�Ӣ��2018-01-09
-
 Photoshop�����Ż���M�ɵ�ˇ�g�֡�Ӣ��
���P����3802018-01-09
Photoshop�����Ż���M�ɵ�ˇ�g�֡�Ӣ��
���P����3802018-01-09
-
 Photoshop����ë����ʥ�Q�����w��Ӣ��
���P����8882017-12-16
Photoshop����ë����ʥ�Q�����w��Ӣ��
���P����8882017-12-16
-
 Photoshop�ϳɄ����Ӣ�ۑ����̡̳�Ӣ��
���P����5802017-12-12
Photoshop�ϳɄ����Ӣ�ۑ����̡̳�Ӣ��
���P����5802017-12-12
