Photoshop�ϳɄ����Ӣ�ۑ����̡̳�Ӣ��(2)
����Դ�� photoshoptutorials�����x���� photoshoptutorials �o�҂����������ʵ����£�Step 9
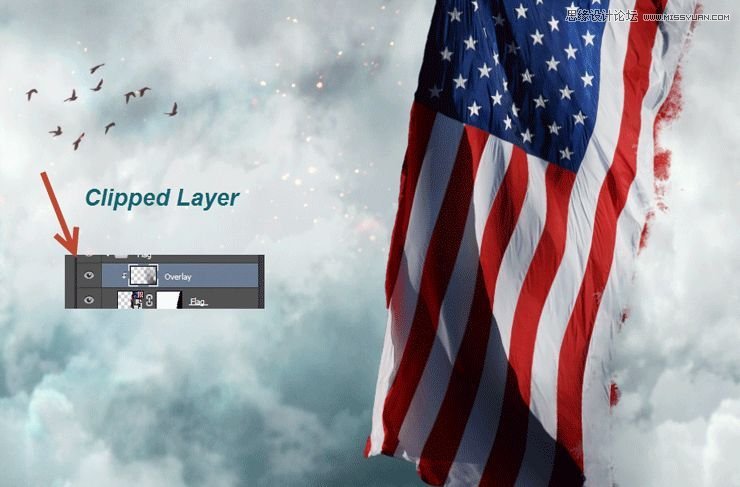
Create a new layer and Alt-click between the new layer and the flag layer. This will clip the new layer to the flag layer. This means that whatever we paint on the new layer will only be visible through the flag layer (the clipped layer). Change the blending mode of the new layer to Overlay and paint with a round soft brush at 40% Opacity with black over the black areas and with white over the already white areas. This step will boost the contrast of the flag and it will make it look better.
Step 10
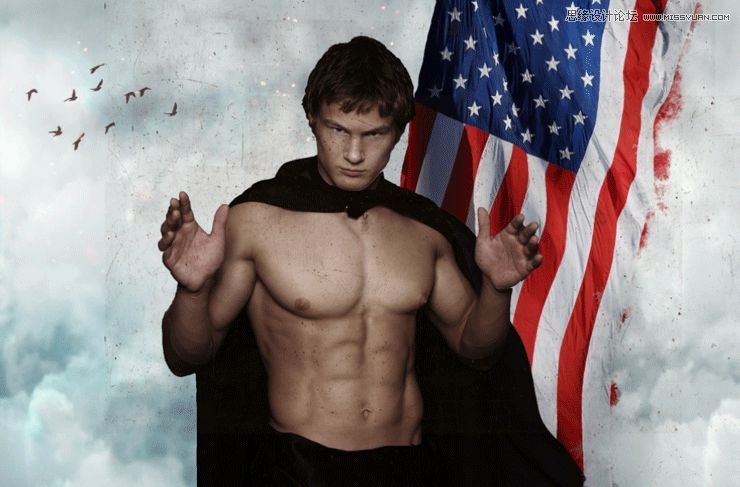
Open the resource “Male”. Make a selection of the person using the Quick Selection tool or if the results are not good you can use the Pen Tool to create a path around the person and then convert the path into a selection (Ctrl + Enter – create a selection from path, Ctrl + Shift + Enter – convert path to selection and add to existing selection, Ctrl + Alt + Enter – convert path to selection and substract from existing selection). Copy and paste the male person into our working document. Convert the pasted layer into a smart object and place it in the middle of the screen as indicated below.

Step 11
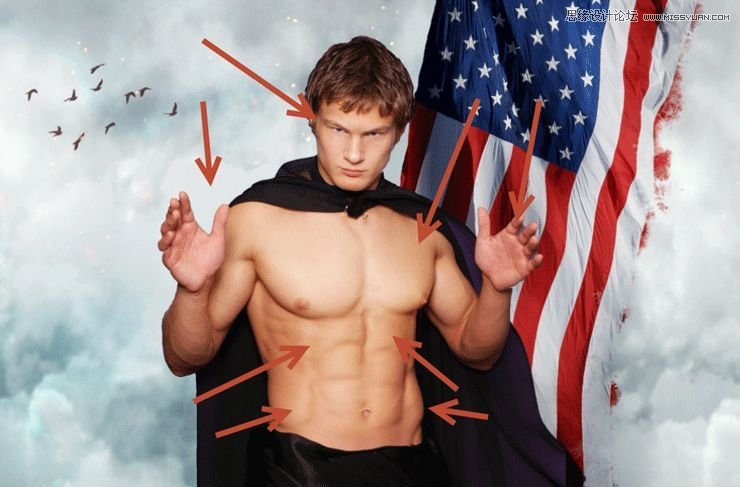
Create a new layer and clip it to the male layer. Change the blending mode to Overlay. Use a round soft brush at 30% opacity to paint with white over the chest, abs, palms and face.
Step 12
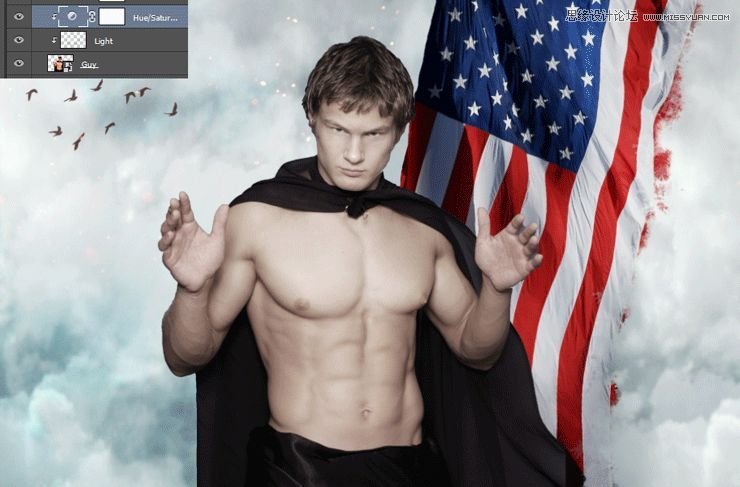
Create a Hue/Saturation Adjustment Layer by choosing Layer > New Adjustment Layer > Hue/Saturation. Lower the saturation to -64. Clip the Hue/Saturation layer to the male person layer.
Step 13
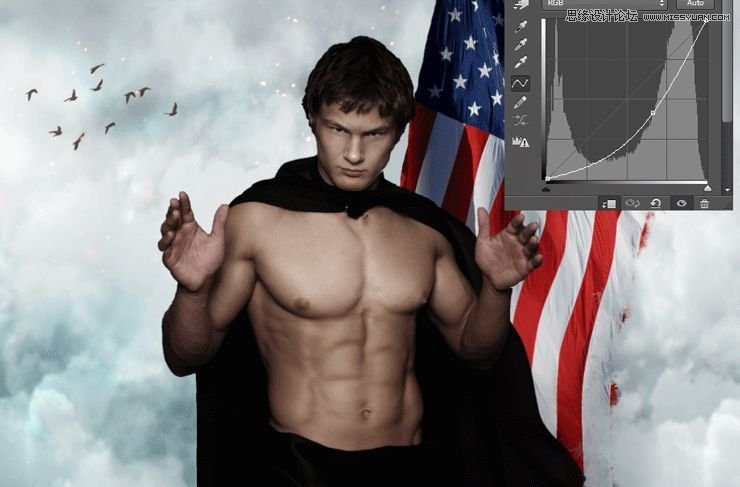
Create a Curves Adjustment layer (Layer > New Adjustment Layer > Curves) and clip it to the male person layer. Click once on the white diagonal line and drag it down to darken. In the layer mask of the curves adjustment layer paint with black over the areas we highlighted at step 11 (face, palms, abs, chest).Create a Curves Adjustment layer (Layer > New Adjustment Layer > Curves) and clip it to the male person layer. Click once on the white diagonal line and drag it down to darken. In the layer mask of the curves adjustment layer paint with black over the areas we highlighted at step 11 (face, palms, abs, chest).Create a Curves Adjustment layer (Layer > New Adjustment Layer > Curves) and clip it to the male person layer. Click once on the white diagonal line and drag it down to darken. In the layer mask of the curves adjustment layer paint with black over the areas we highlighted at step 11 (face, palms, abs, chest).
Step 14
Import the debris brush. Create a new layer and create some debris using black color.
Step 15
Add a layer mask to the debris layer and hide all debris that falls outside our guy by painting with black over the areas you want hidden.

Step 16
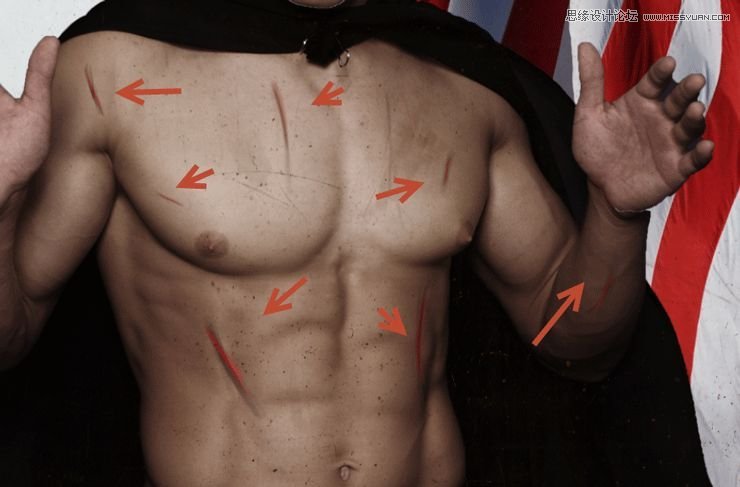
Create a new layer. Choose the standard Chalk Brush and lower its size to 30 pixels. Using red and black paint some wounds on the chest, abs and his left arm. In order to create a wound paint with red a loose line and then gently paint with black around it.
Step 17
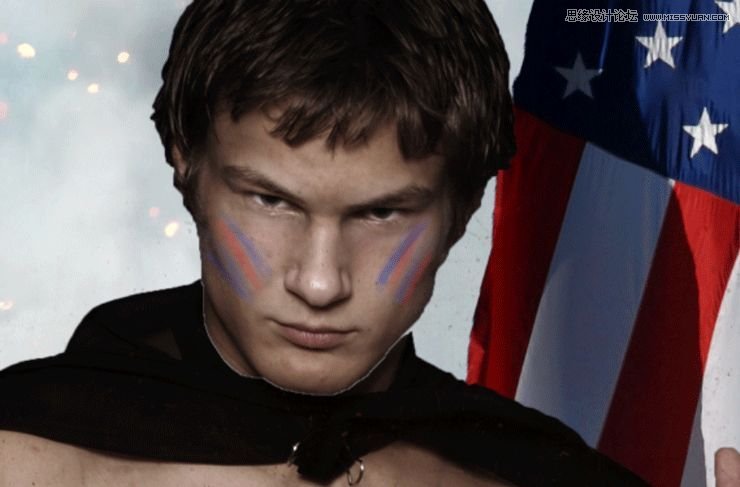
Create a new layer. Use red and blue to paint some war paint on the guy’s cheekbones. I sampled the colors directly from the flag.
 ���㲻Ҫ��
-
 Photoshop�������L�������ƬЧ����Ӣ��2018-04-23
-
 Photoshop�ϳ��L����������L�i¹��Ӣ��2018-04-23
-
 Photoshop�ϳɱ�����Ч�Ľ��~������Ӣ��2018-02-10
-
 Photoshop�ϳɉ����L���ɭ�ֈ�����Ӣ��2018-02-10
-
 Photoshop�ϳ�����ʩ��������Ӣ��2018-02-10
-
 Photoshop���������|�е�3D���w�֡�Ӣ��2018-01-09
-
 Photoshop�OӋ����ȼ��ˇ�g�ֽ̡̳�Ӣ��2018-01-09
-
Photoshop�ϳɱ�����Ч�Ľ��~������Ӣ��
���P����34052018-02-10
-
Photoshop�ϳɉ����L���ɭ�ֈ�����Ӣ��
���P����24492018-02-10
-
Photoshop�OӋ����ȼ��ˇ�g�ֽ̡̳�Ӣ��
���P����7612018-01-09
-
 Photoshop�ϳɳ��б����ǹ��������Ӣ��
���P����7142017-12-12
Photoshop�ϳɳ��б����ǹ��������Ӣ��
���P����7142017-12-12
